I have done quite a bit of Improv quilting over the course of the last year or so…. for me it is a great way to dust off the cobwebs, particularly if I have lost my sewjo a little.
So this wonky log cabin was a fun project that started after I had collected a hug bag of navy scraps….
So I started with the navy scraps and as I begin putting the log cabin blocks together the navy seemed boring… it needed a little something to give it a lift. It just so happens that I had a small scrap pile of orange bits that were left over from another quilt and the navy and orange were the perfect combination.
The orange is the perfect contrasting color to the blue… these two colors are actually opposite each other on the color wheel…. which just enhances the impact of the color splashes.
The trick is to only put a few pieces of the highlight color in each of the log cabin blocks…. some of the orange is a full strip and other bits of orange are only inserted into the navy strip…. and I think those little splashes are the most successful pops of color.
Because of the randomness of the orange inserts your eye moves around the quilt more… hunting out those little splashes of contrast.
This quilt is also already out in the wild. I made it after the hospital said they needed a few more quilts for older teenage boys. I am a pink girl through and through but I loved the challenge of making something not too girly.
2020 was definitely the year of Bear Paw blocks for me. I taught a color class for Modern Domestic, a local quilt store, which was all about color in quilting. We used a fabulous book by Rachel Hauser of Stitched in Color called a Quilters Field Guide to Color as a resource… and like Rachel does in the book we workshopped color using Bear Paw blocks. What this means is I made enough bear paw blocks to finish up 8 quilts… you are going to see a lot of bear paws over the coming months.
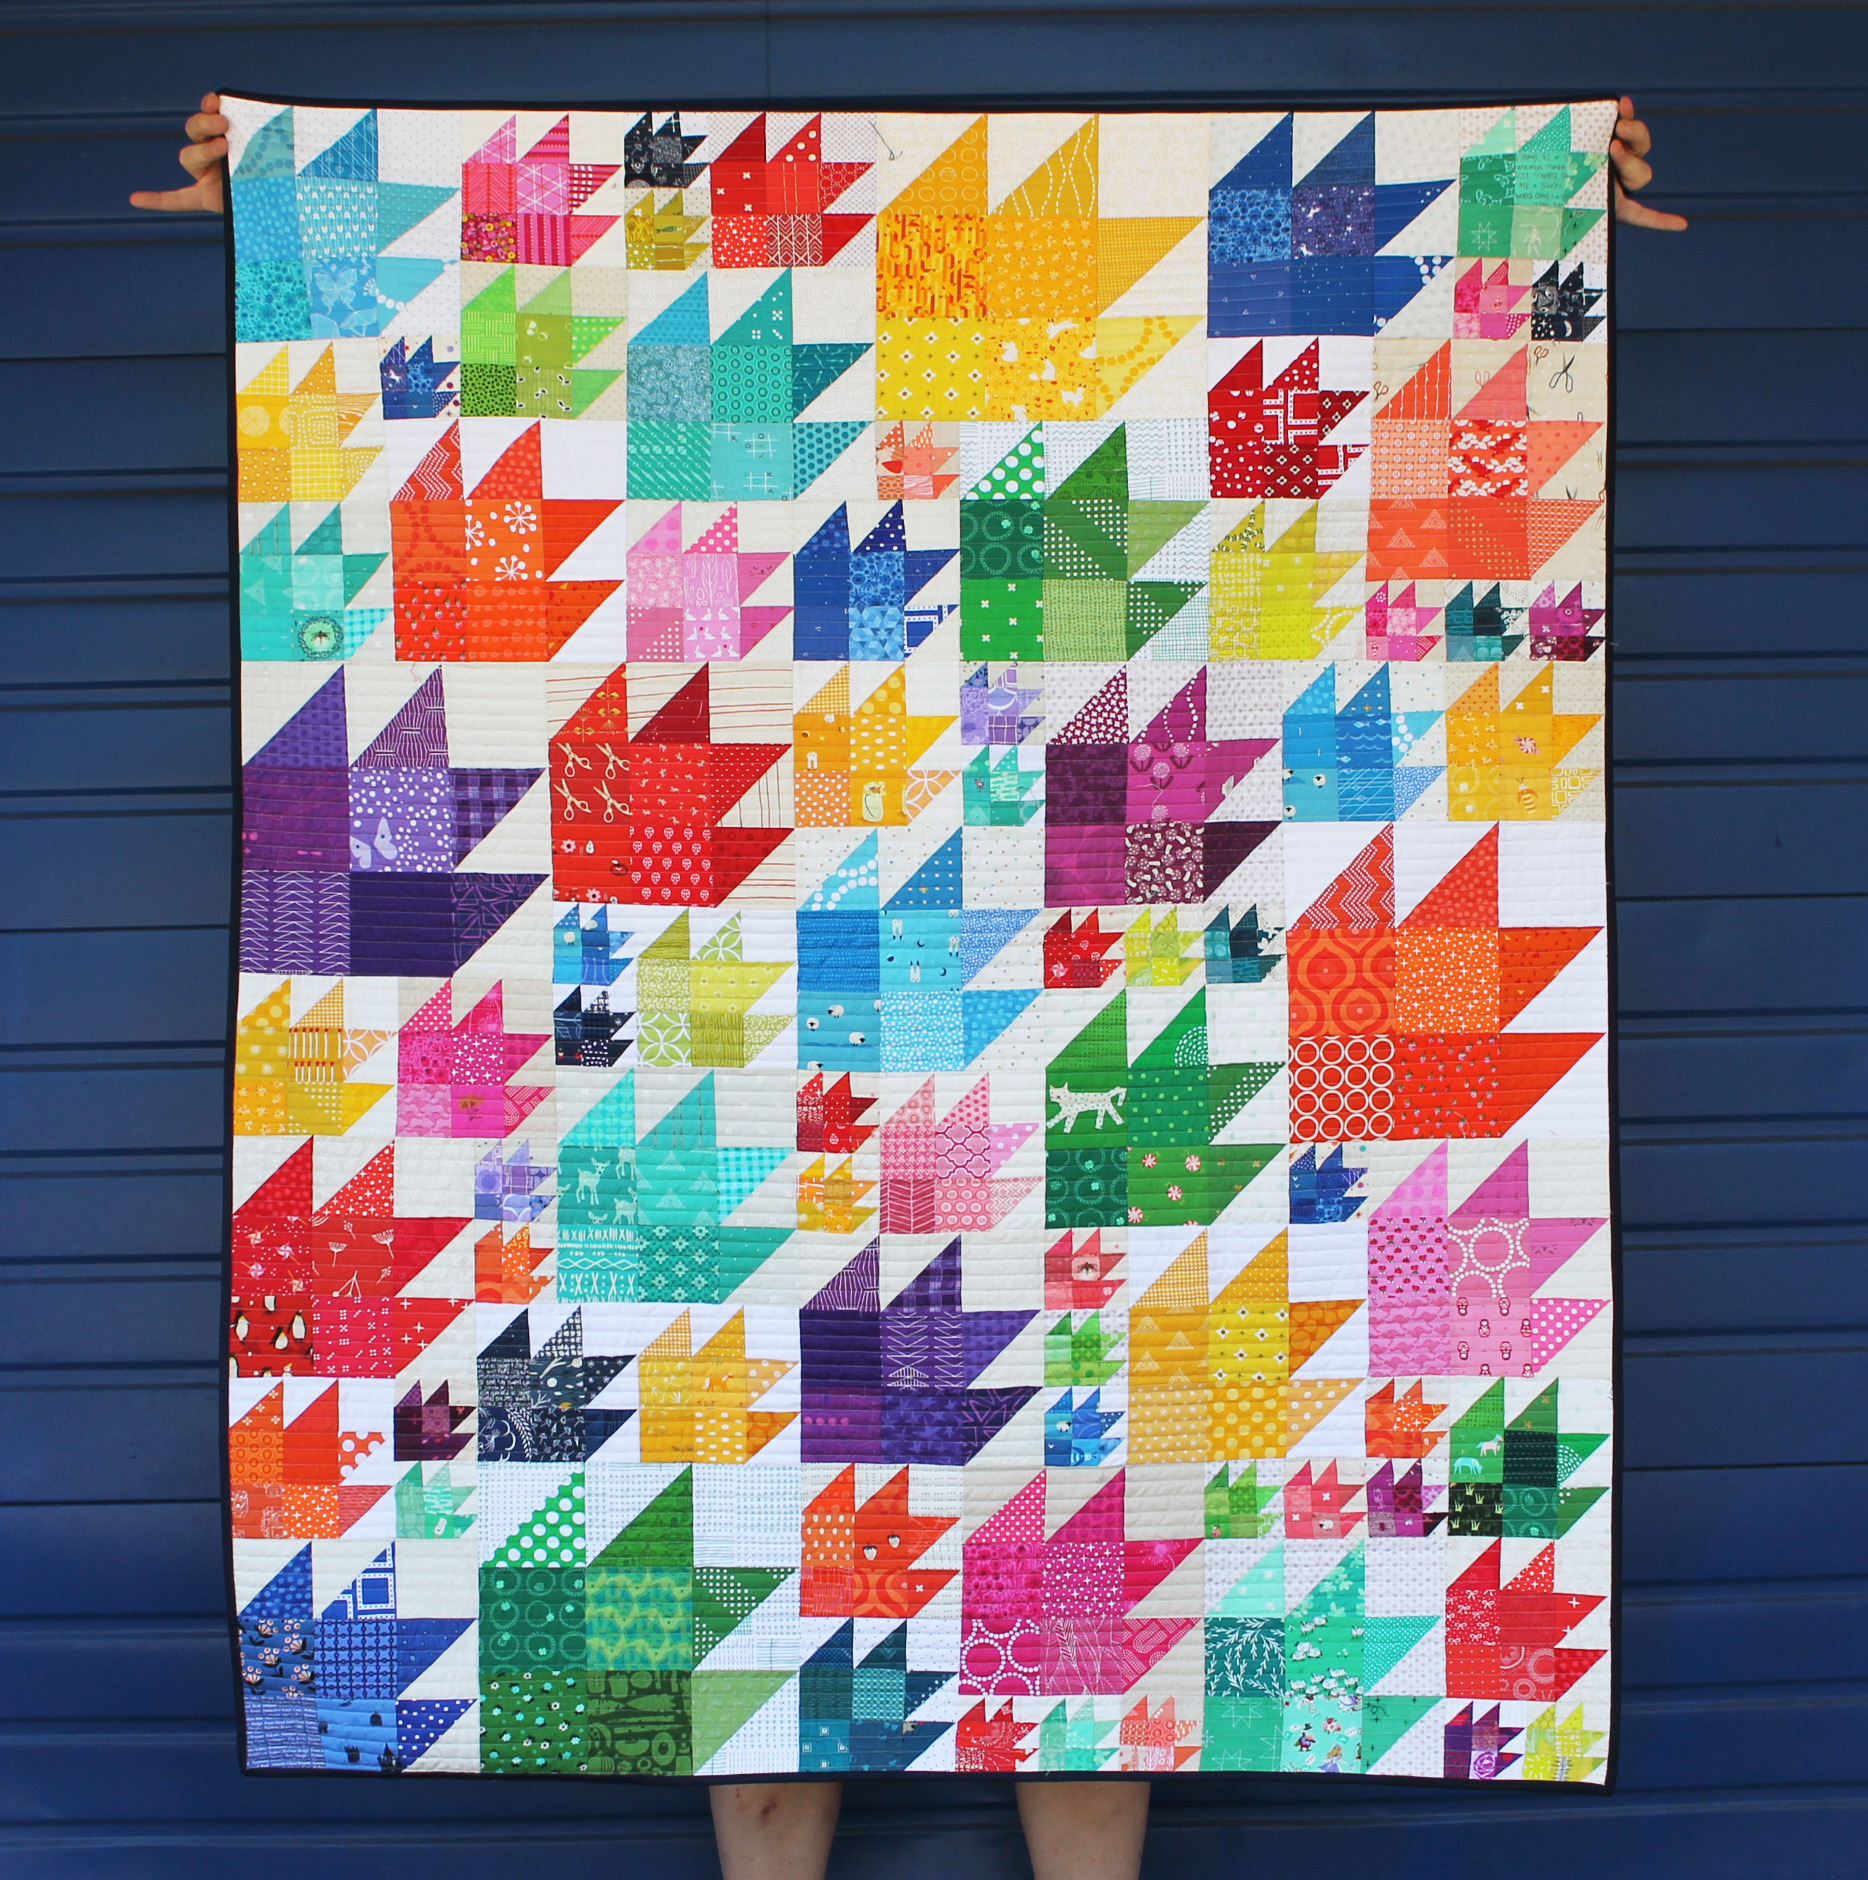
But before I started my over zealous production of bear paws for class, I set the block as my Do Good Stitches block. Actually in May 2019 I posted about making two blocks at a time in various sizes… the result of the tutuorial and my Bee mates work is this stunning quilt…
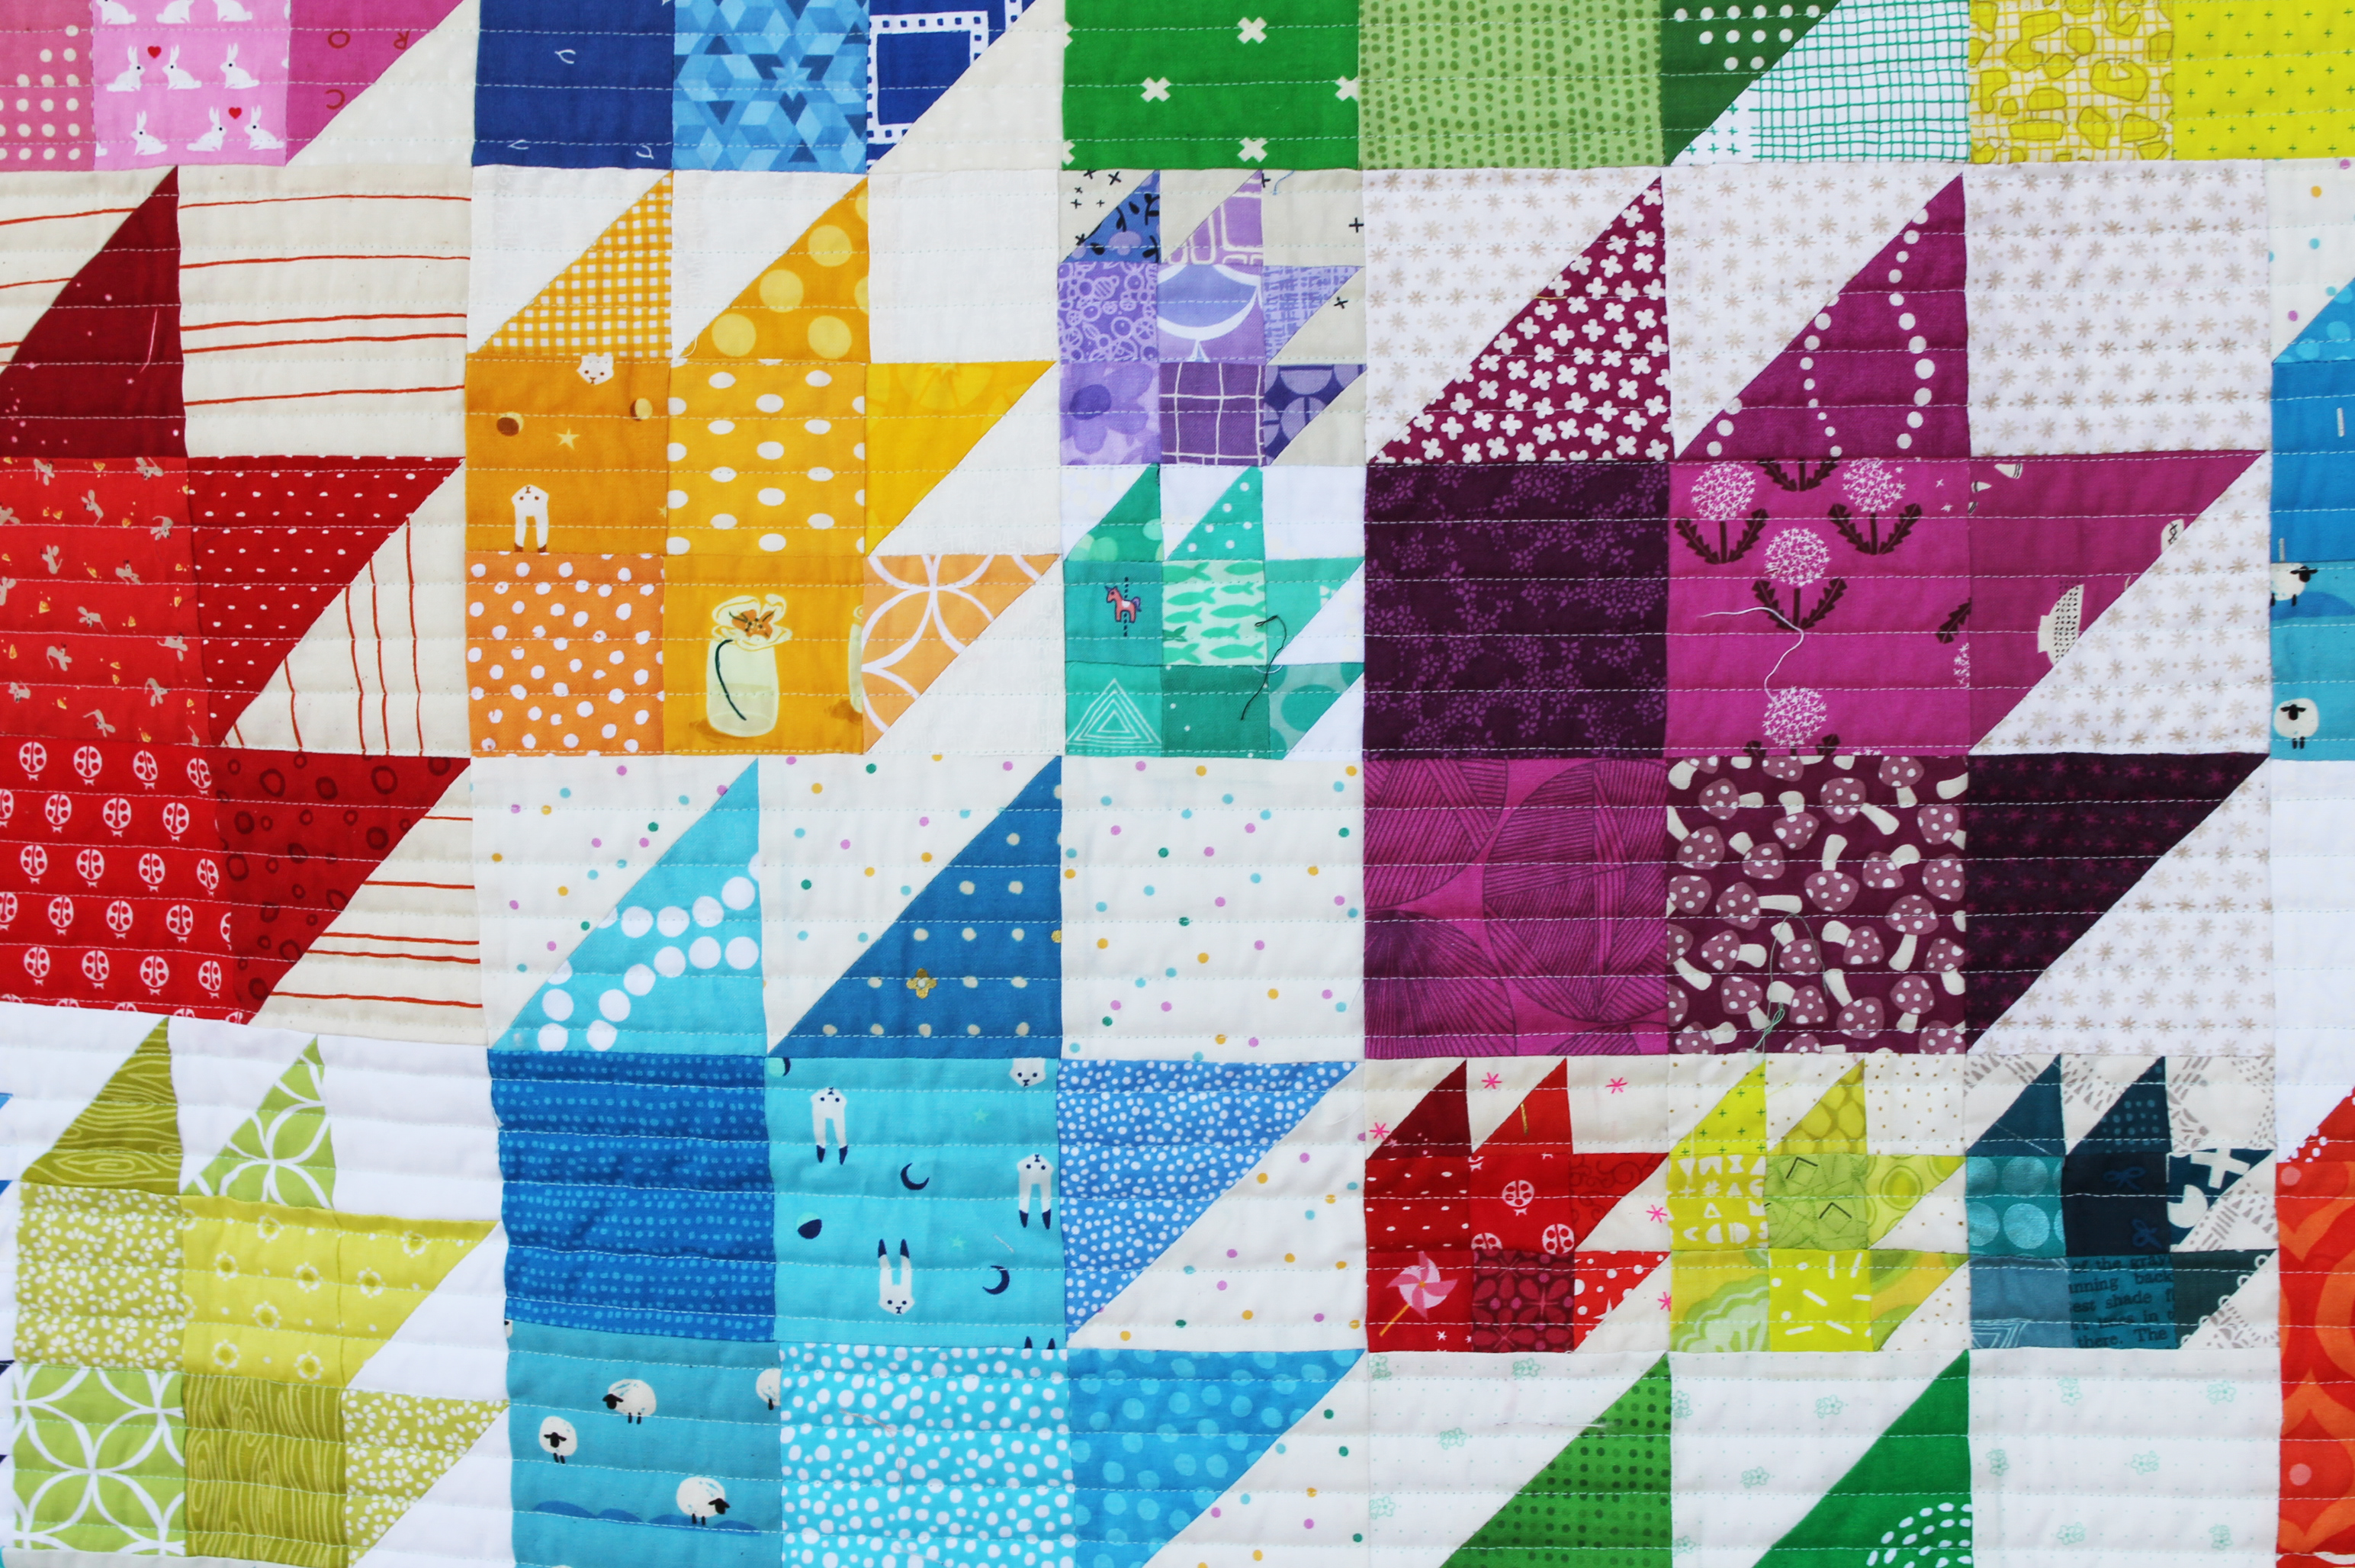
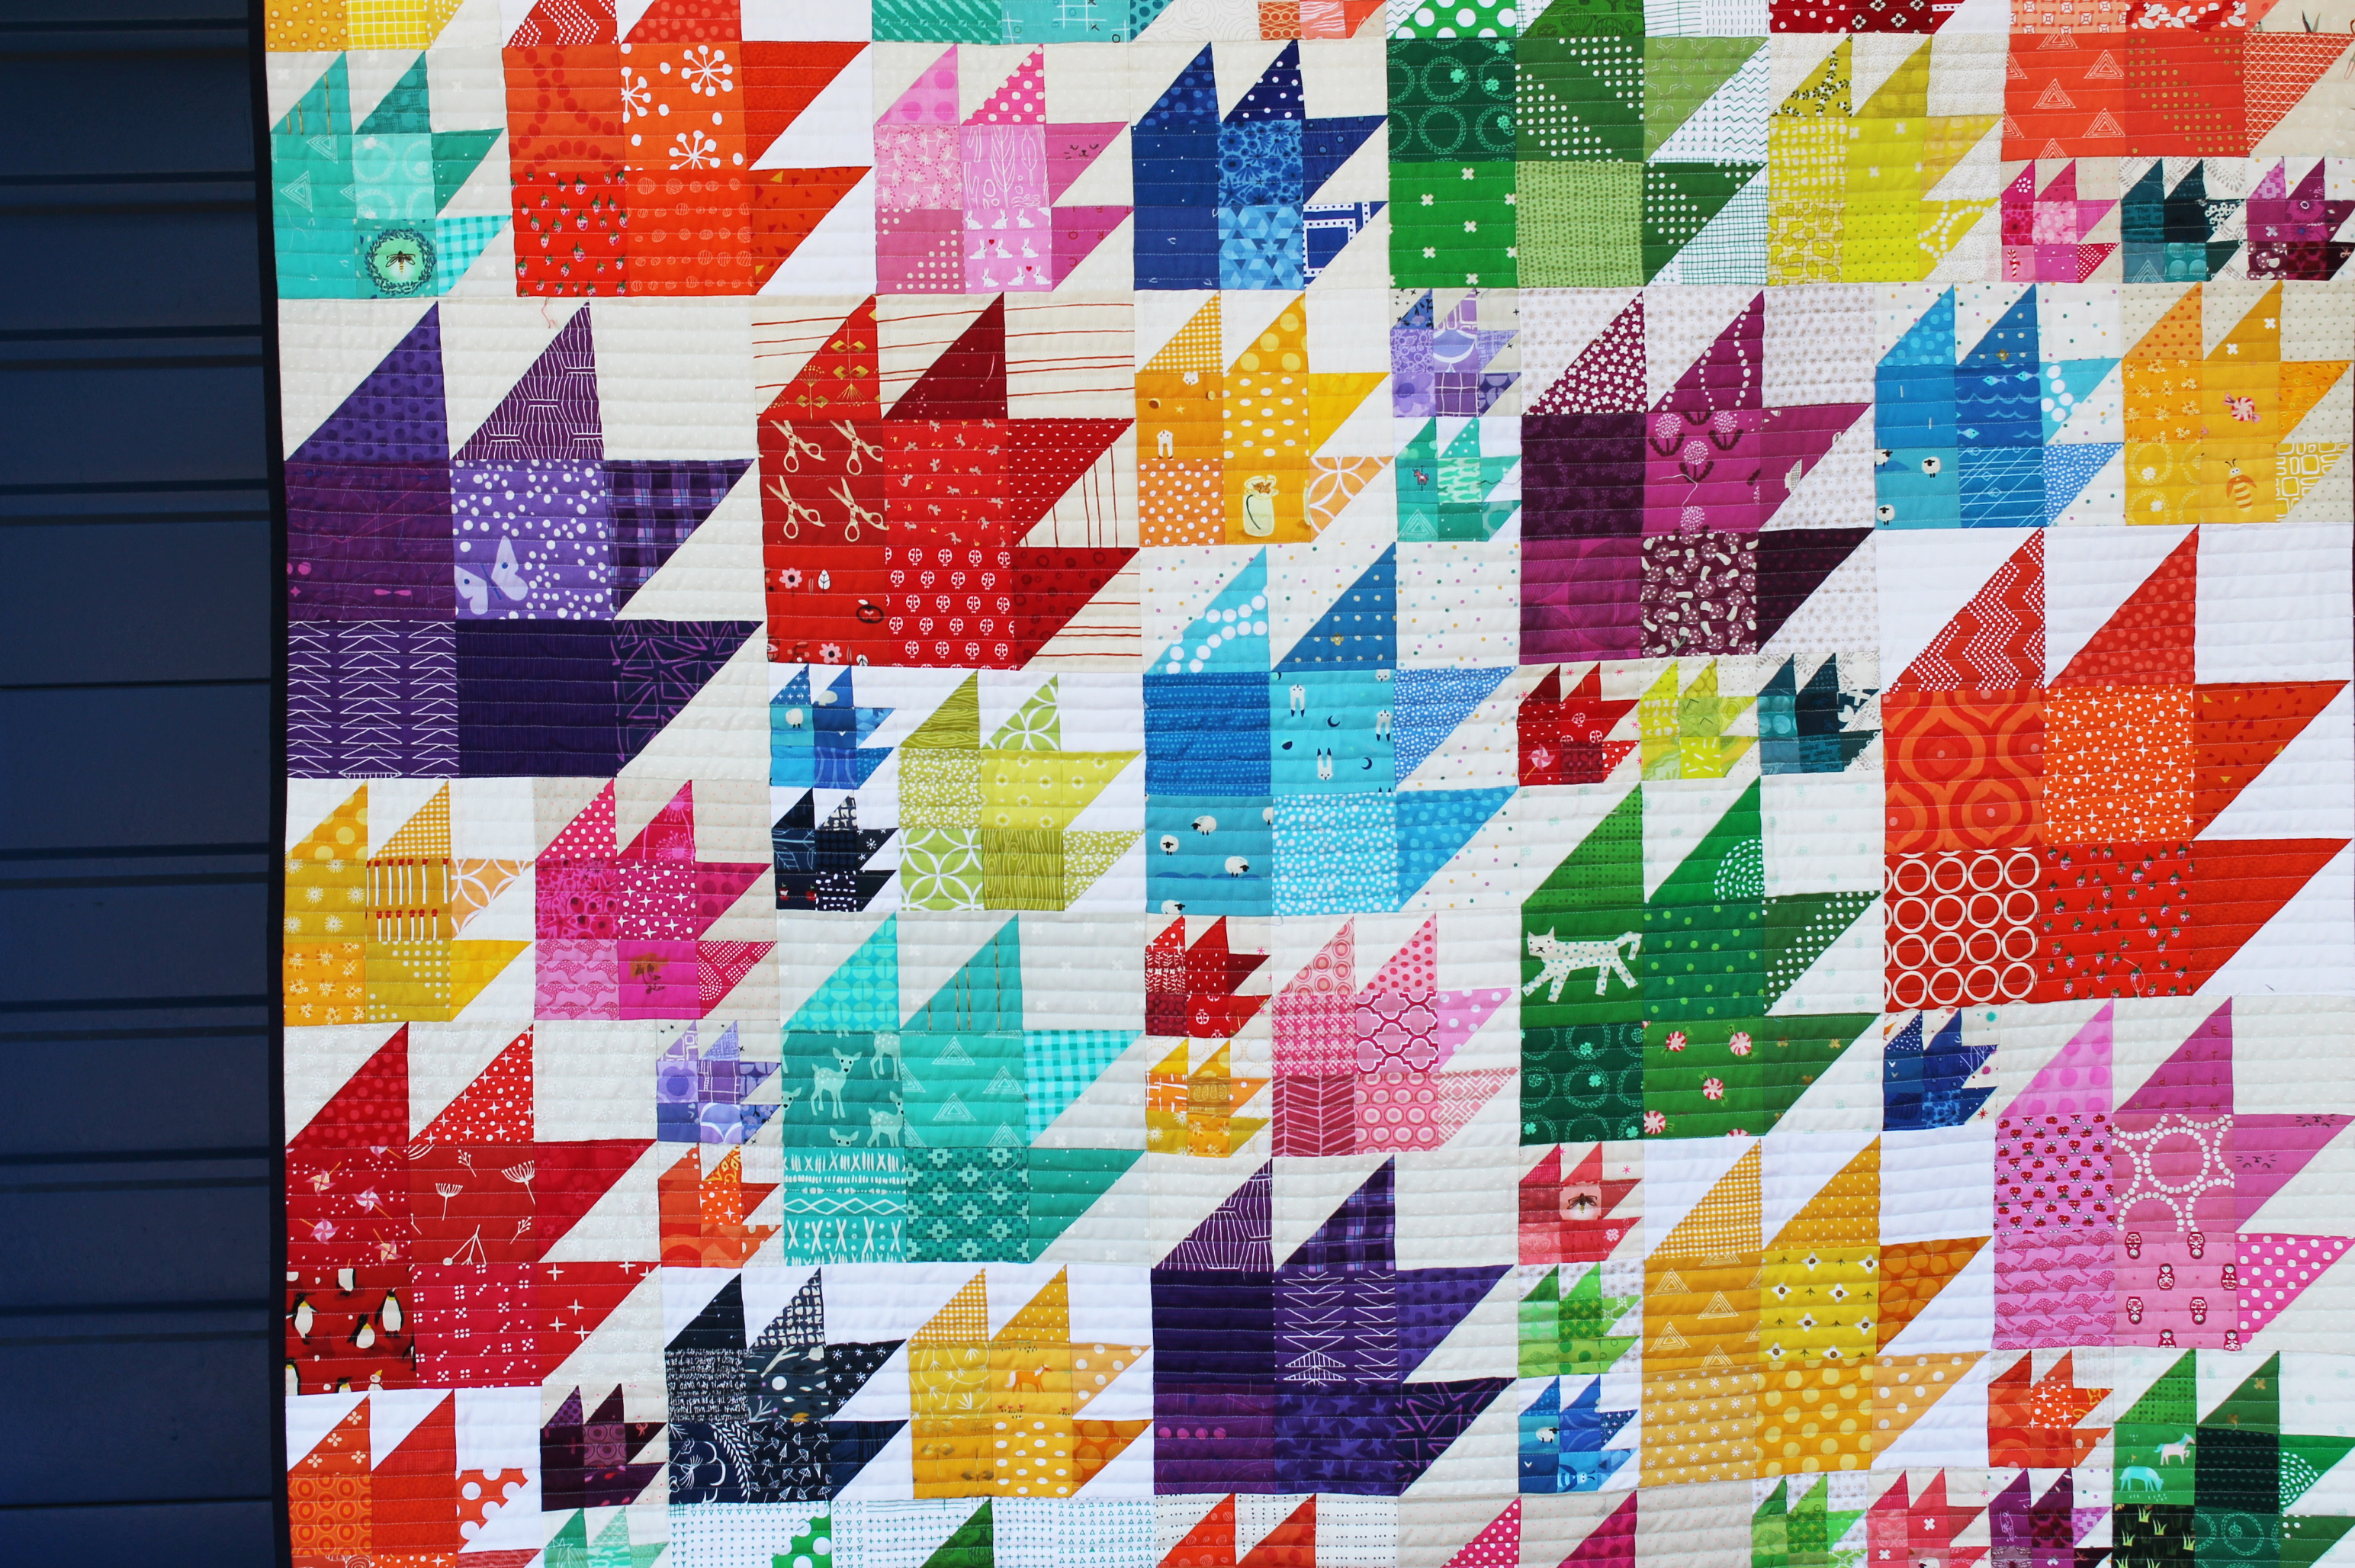
This quilt uses blocks that are 3, 6, 9 and 12 inches big… a whole rainbow of colors…. and tons and tons of scraps.
Each body of the bear paw is made up of four squares which allows for maximum fussy cutting potential and scrap usage. I know with the blocks I made I had a blast finding different novelty prints to cut up.
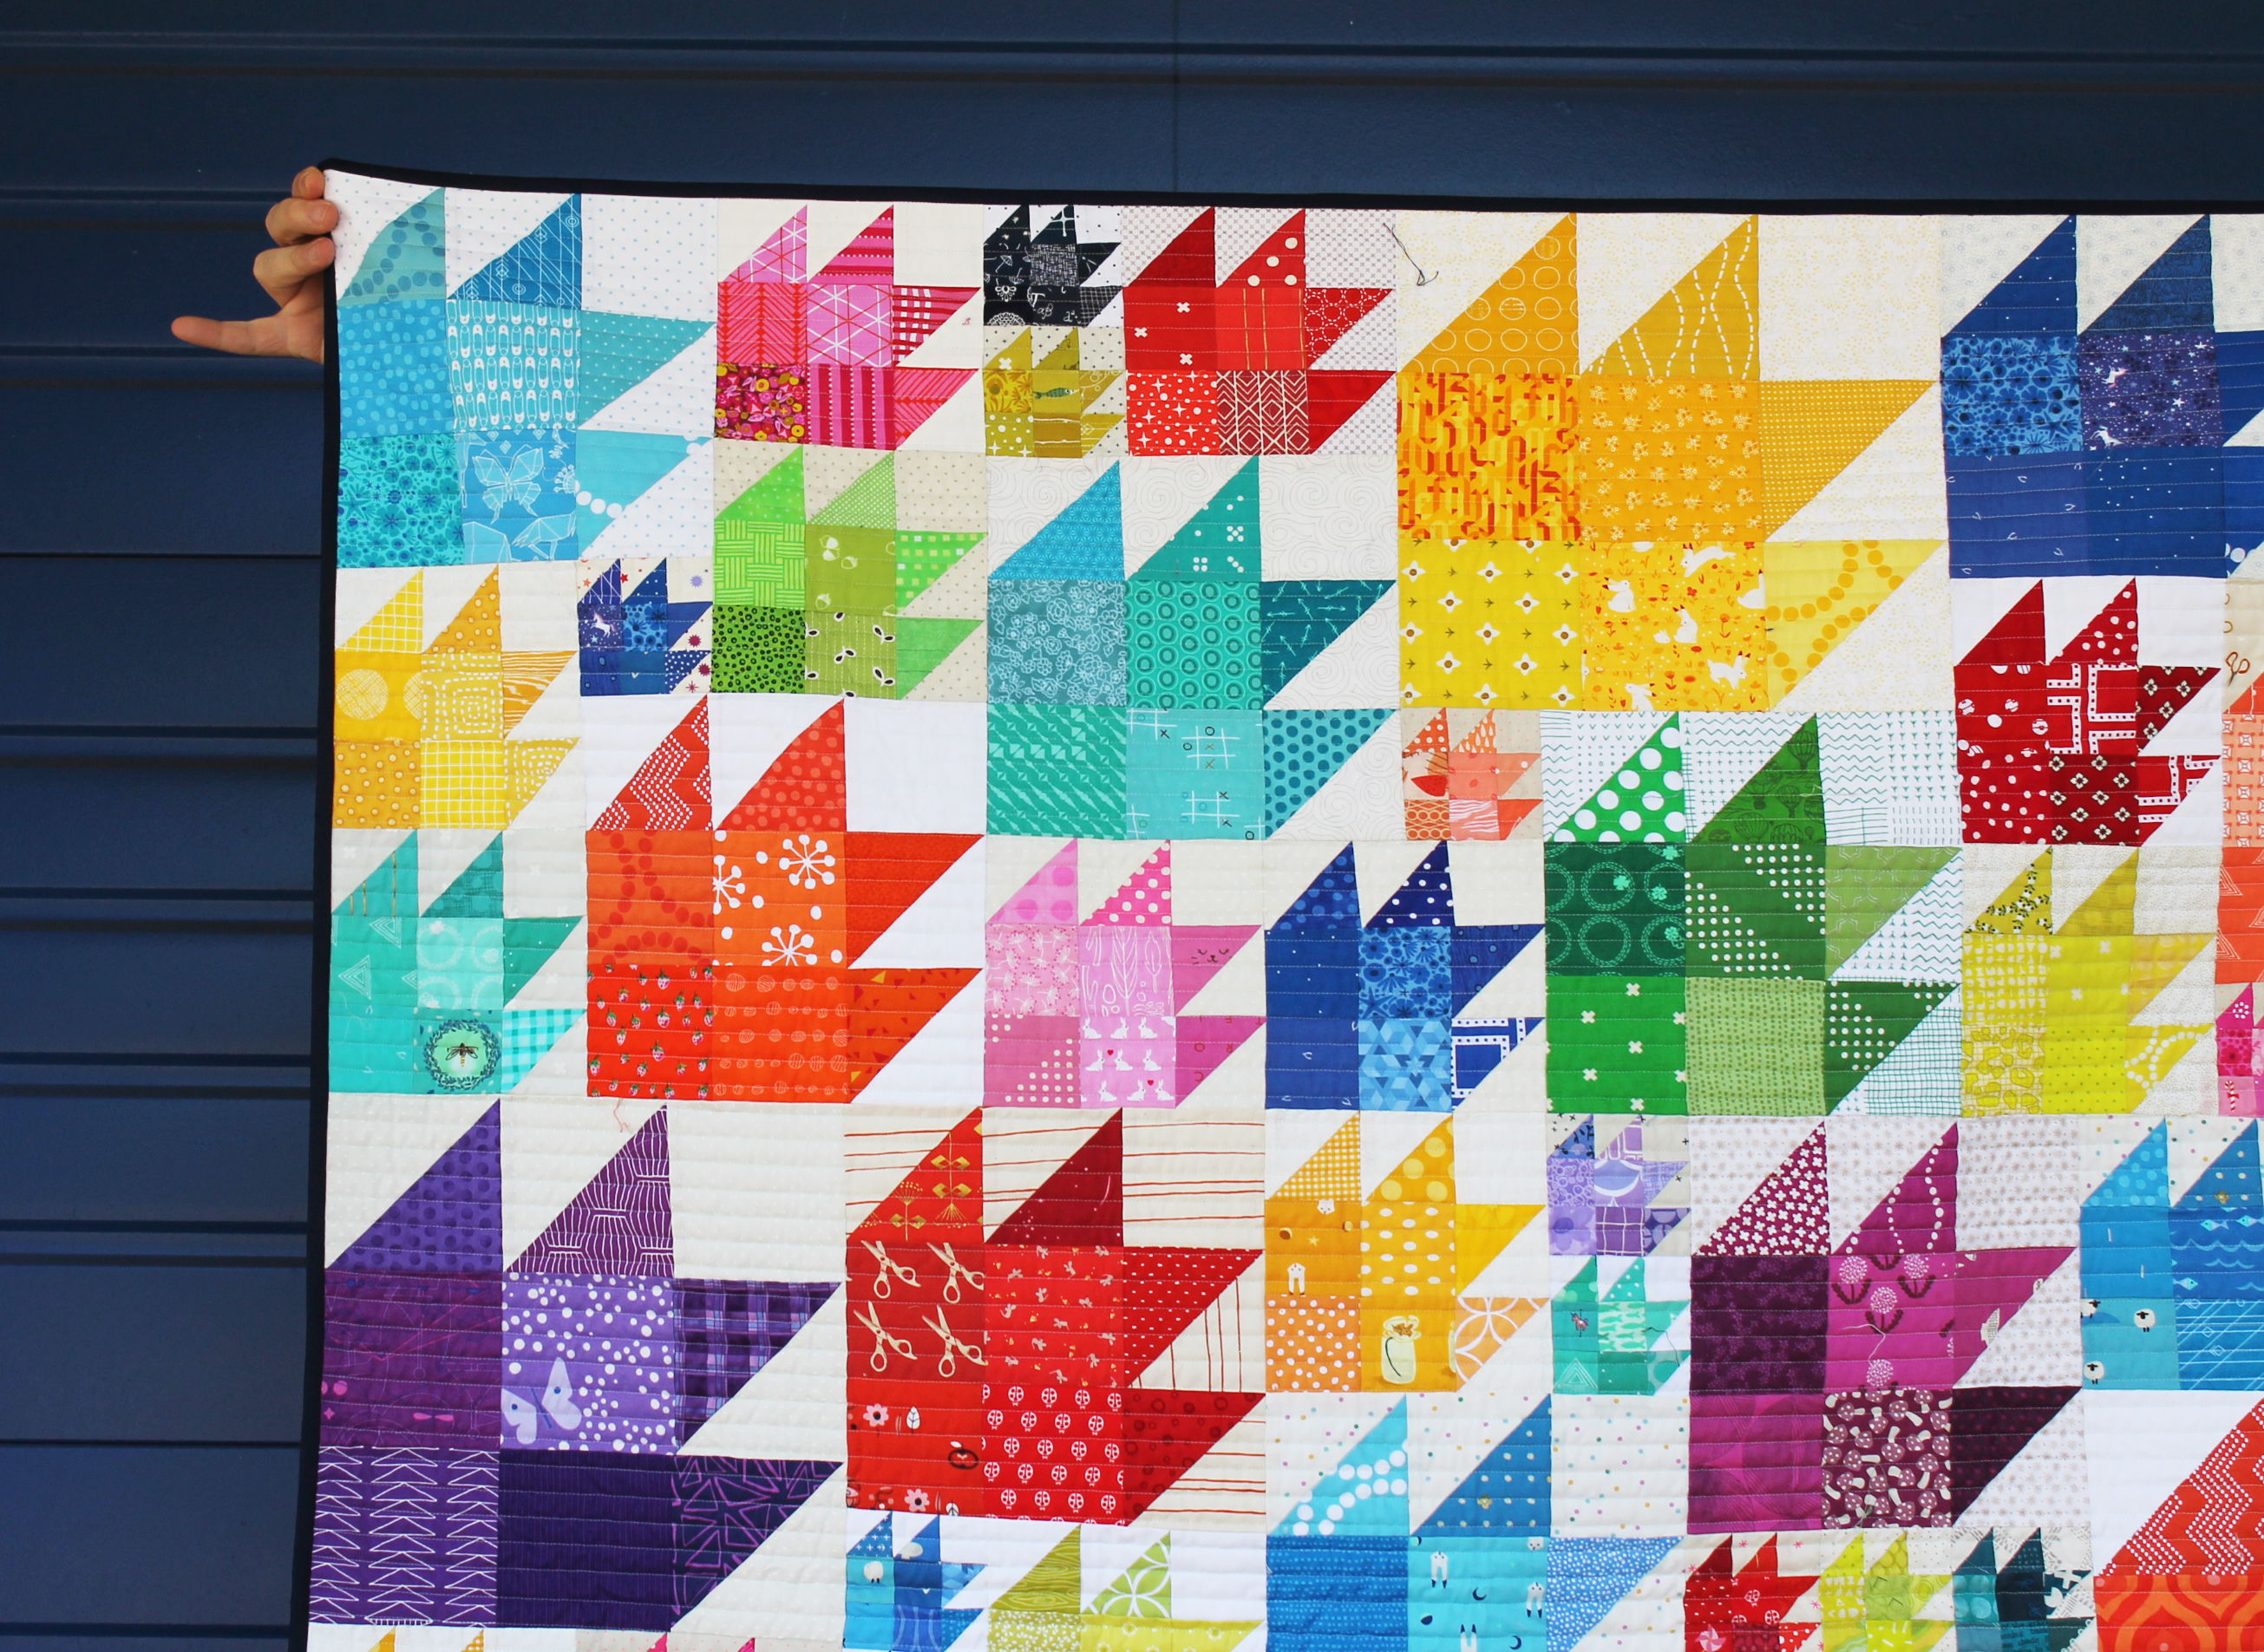
Now laying out this quilt was not to hard because there was a logic to the size blocks I chose – using a 3 inch grid…. but being a perfectionist I did um and ah about it a lot. It sat on my design wall for a bit before I was happy with it.
It was slightly tedious to sew together…. I grouped blocks together where I could and only had a few partial seams to deal with. I could have made it easier on myself and just gridded the layout so there were no difficult seams but in the end I loved the layout I had put up… it does not feel regular or predictable.
So this post I am giving you half the Nick pinkies photos to end… as well as the a full body shot. Mr Wombat is usually pretty camera shy but I snuck this picture of him. His identity is safe as he is fully masked LOL.
This quilt headed into the wild last year via the Portland Modern Quilt Guilds charity quilt program… which we somehow managed to keep going despite a world wide pandemic… actually we managed to get 15 to 20 quilts a month to our local Pediatric Intensive Care Unit which was quite a feat.
First I want to say thank you to everyone for the well wishes and kind comments on my last post. I read them all… and will slowly work through responding but know I was really touched by the reaction to my news. It was not an easy post to write but now that it is done I can start with the quilt catch up…
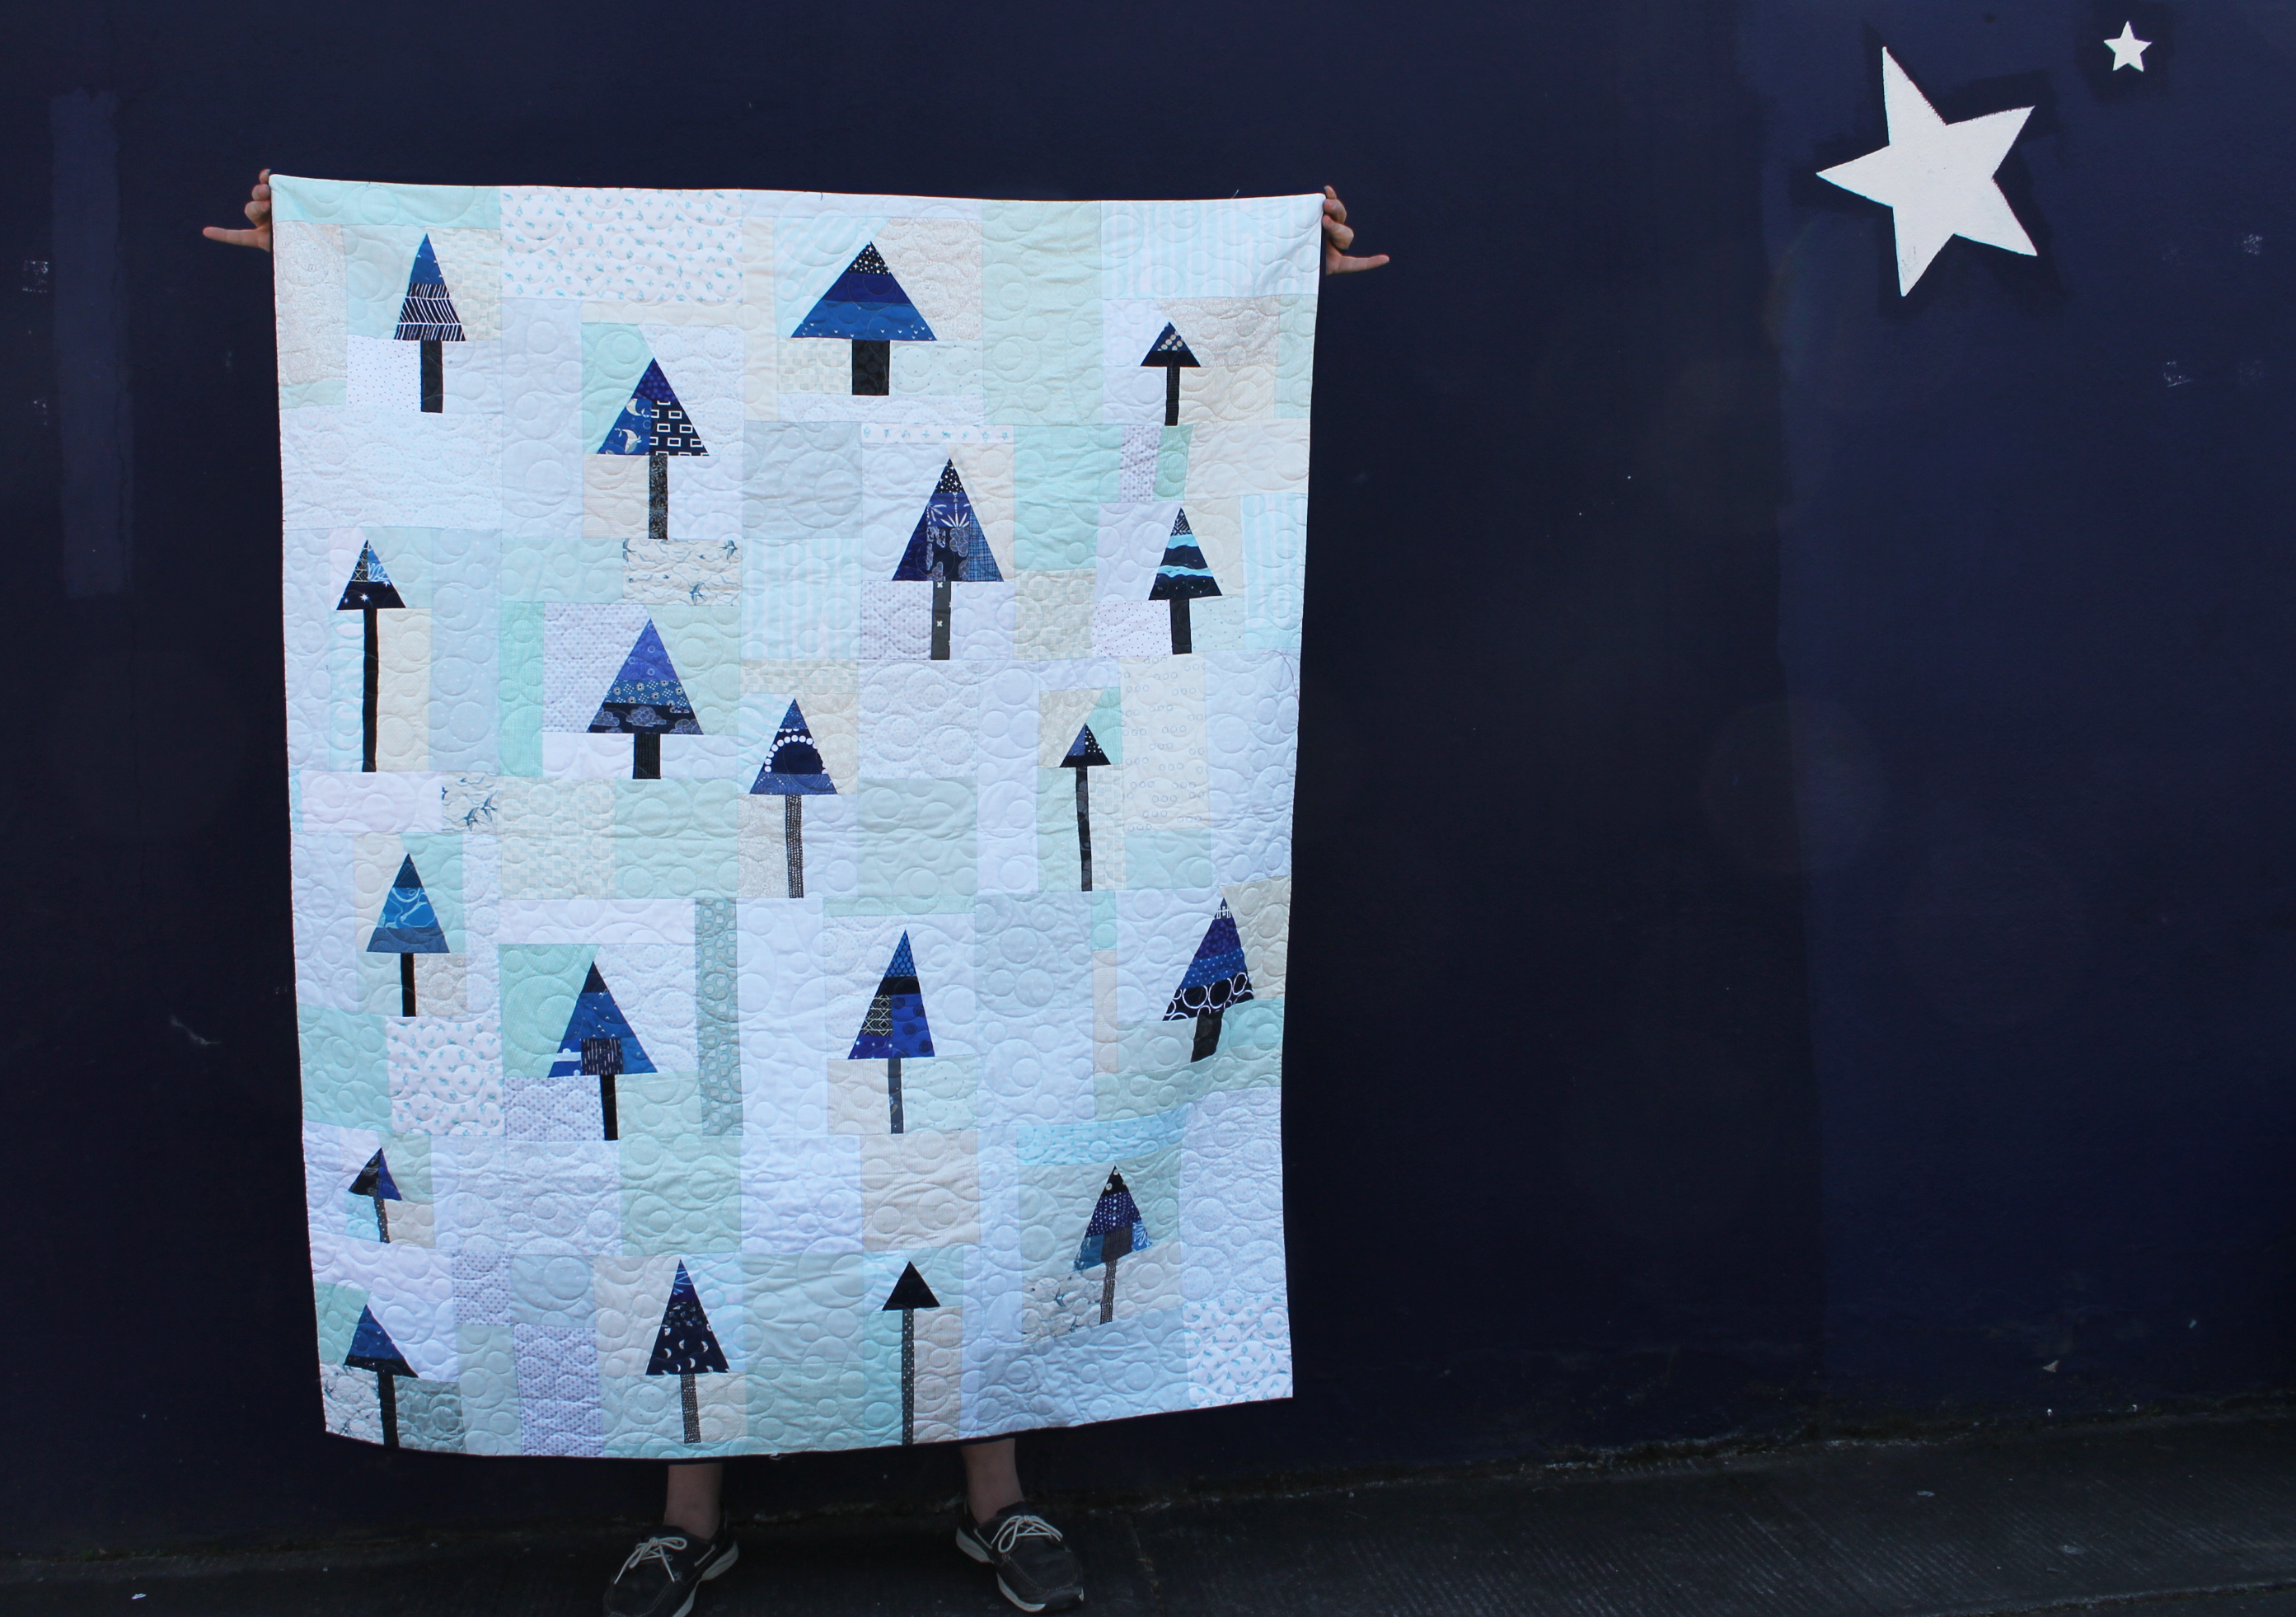
And first up is one of my favorite finishes over the last year or so… an improv cool tree quilt…
I started this top in 2019 when I was teaching Improv quilting at Modern Domestic…. I had a pile of light blue fabrics and wanted to use them…
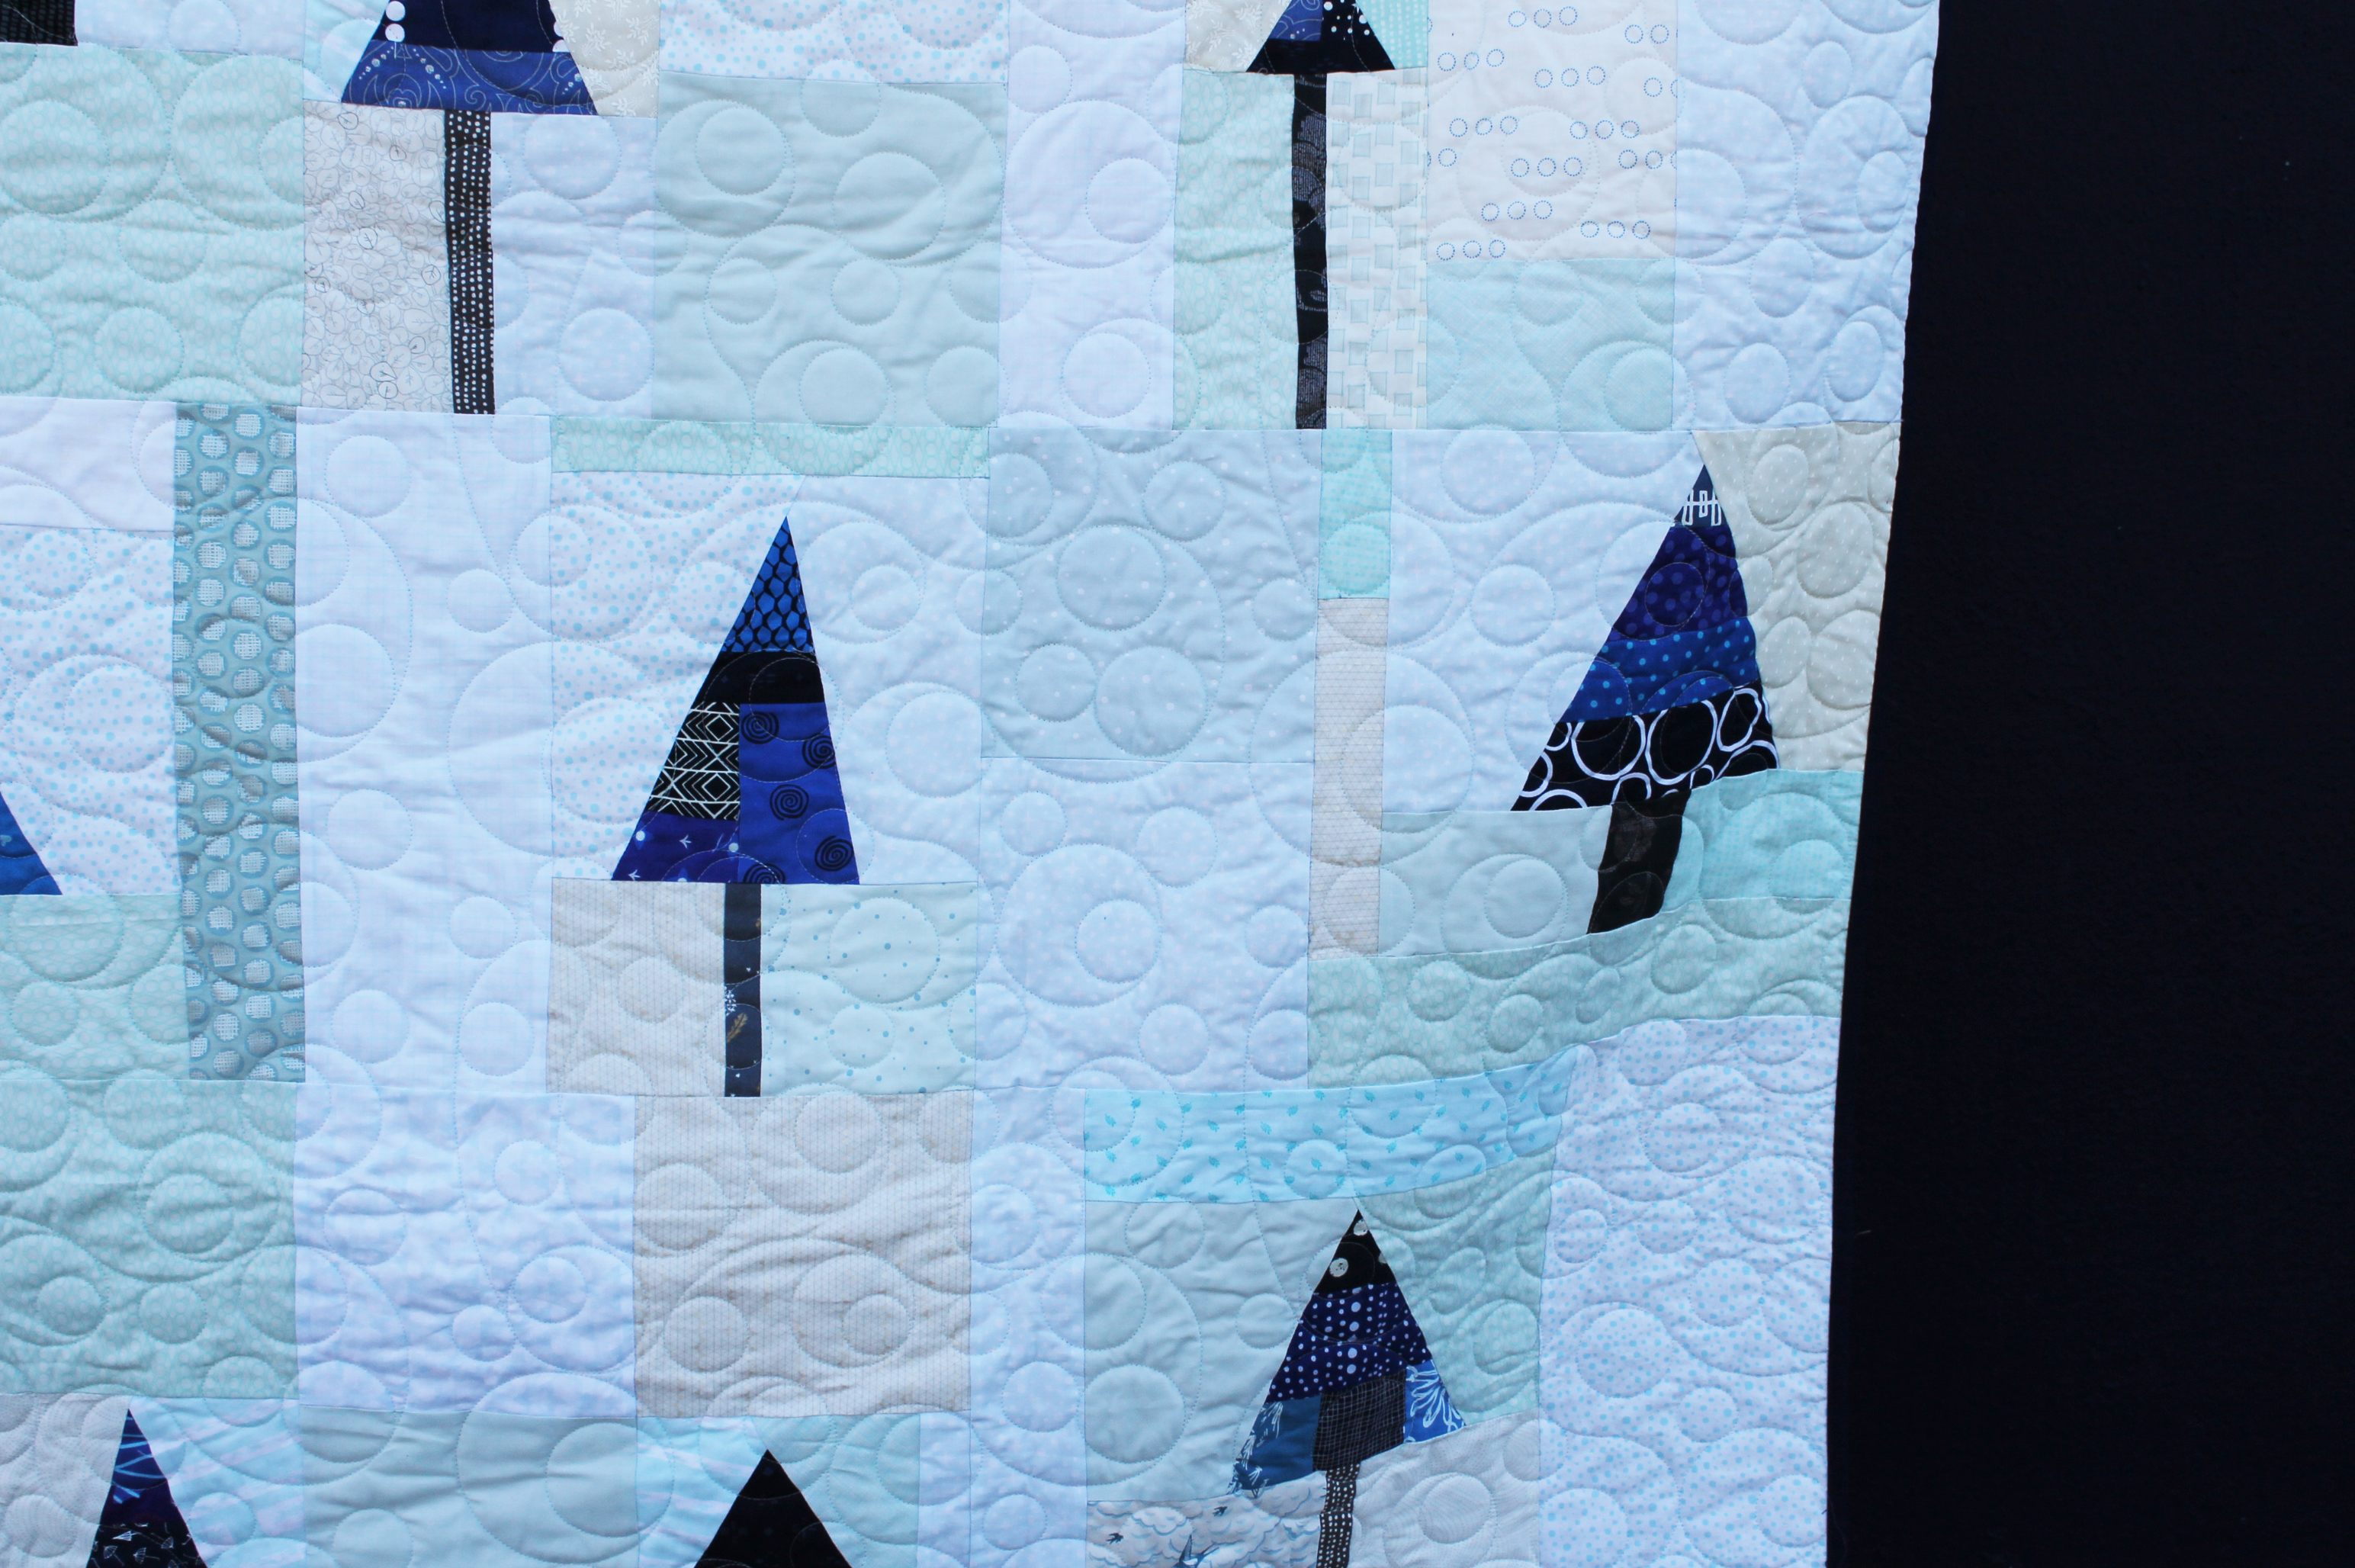
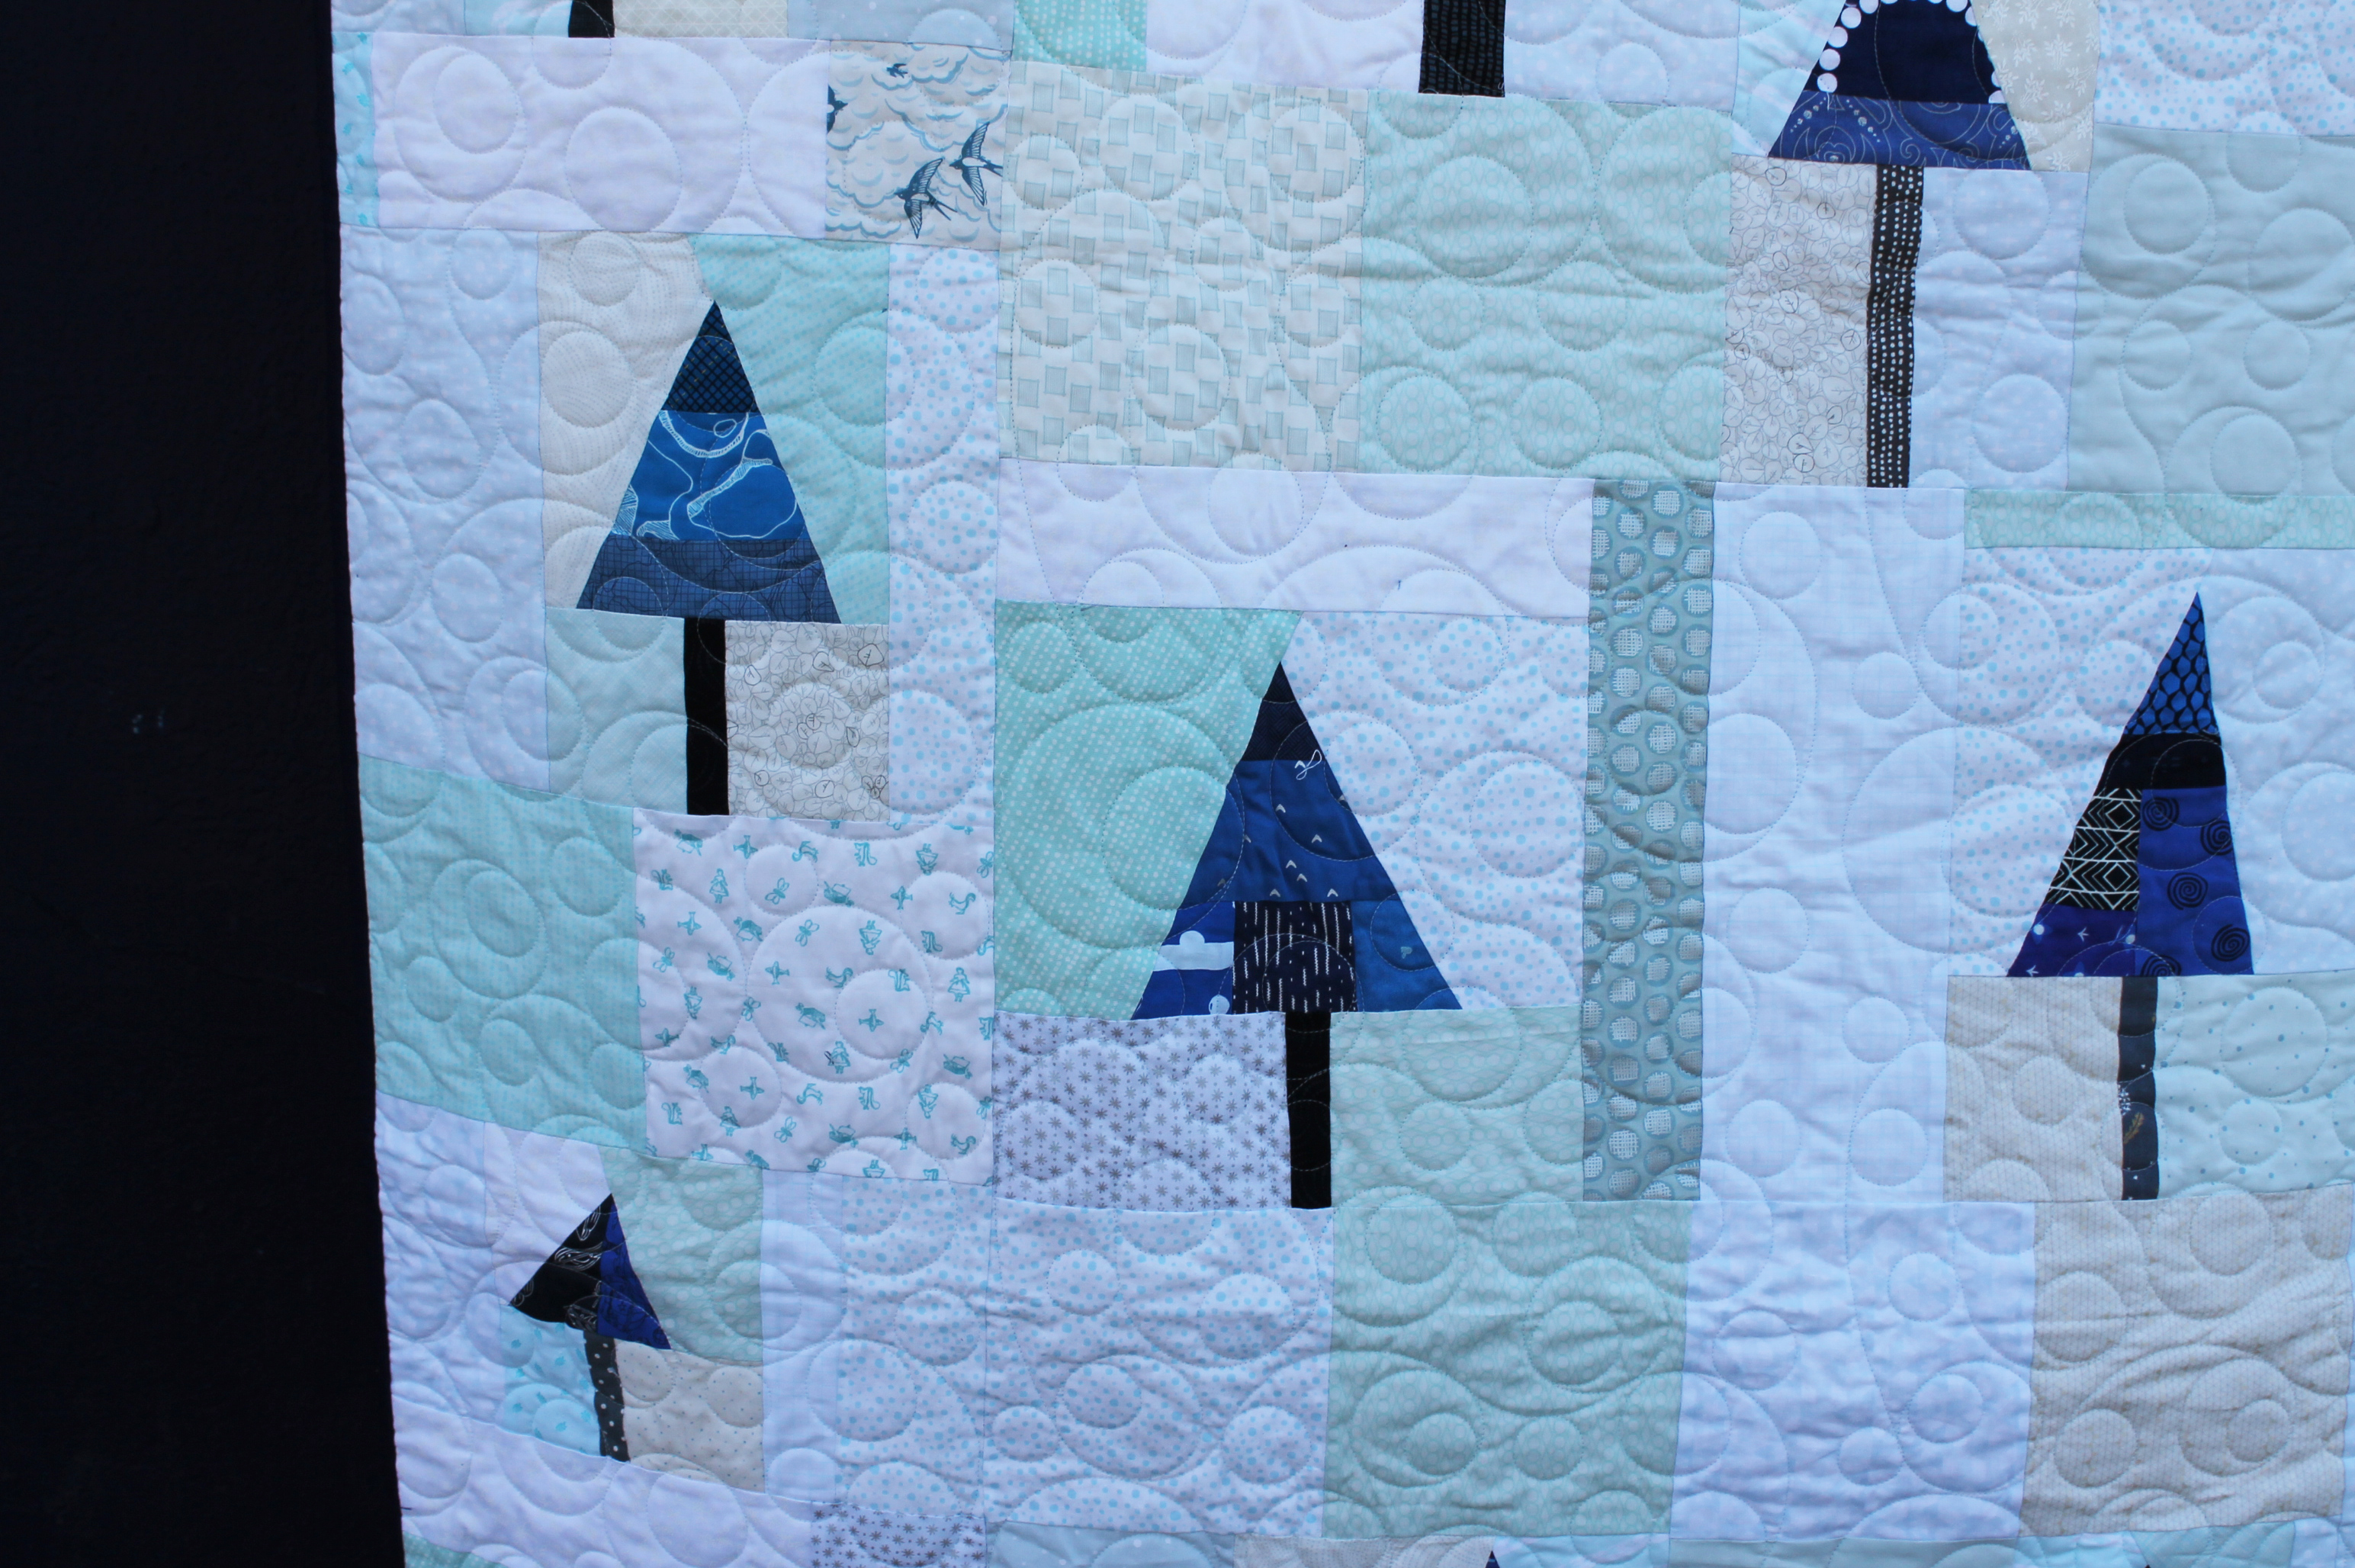
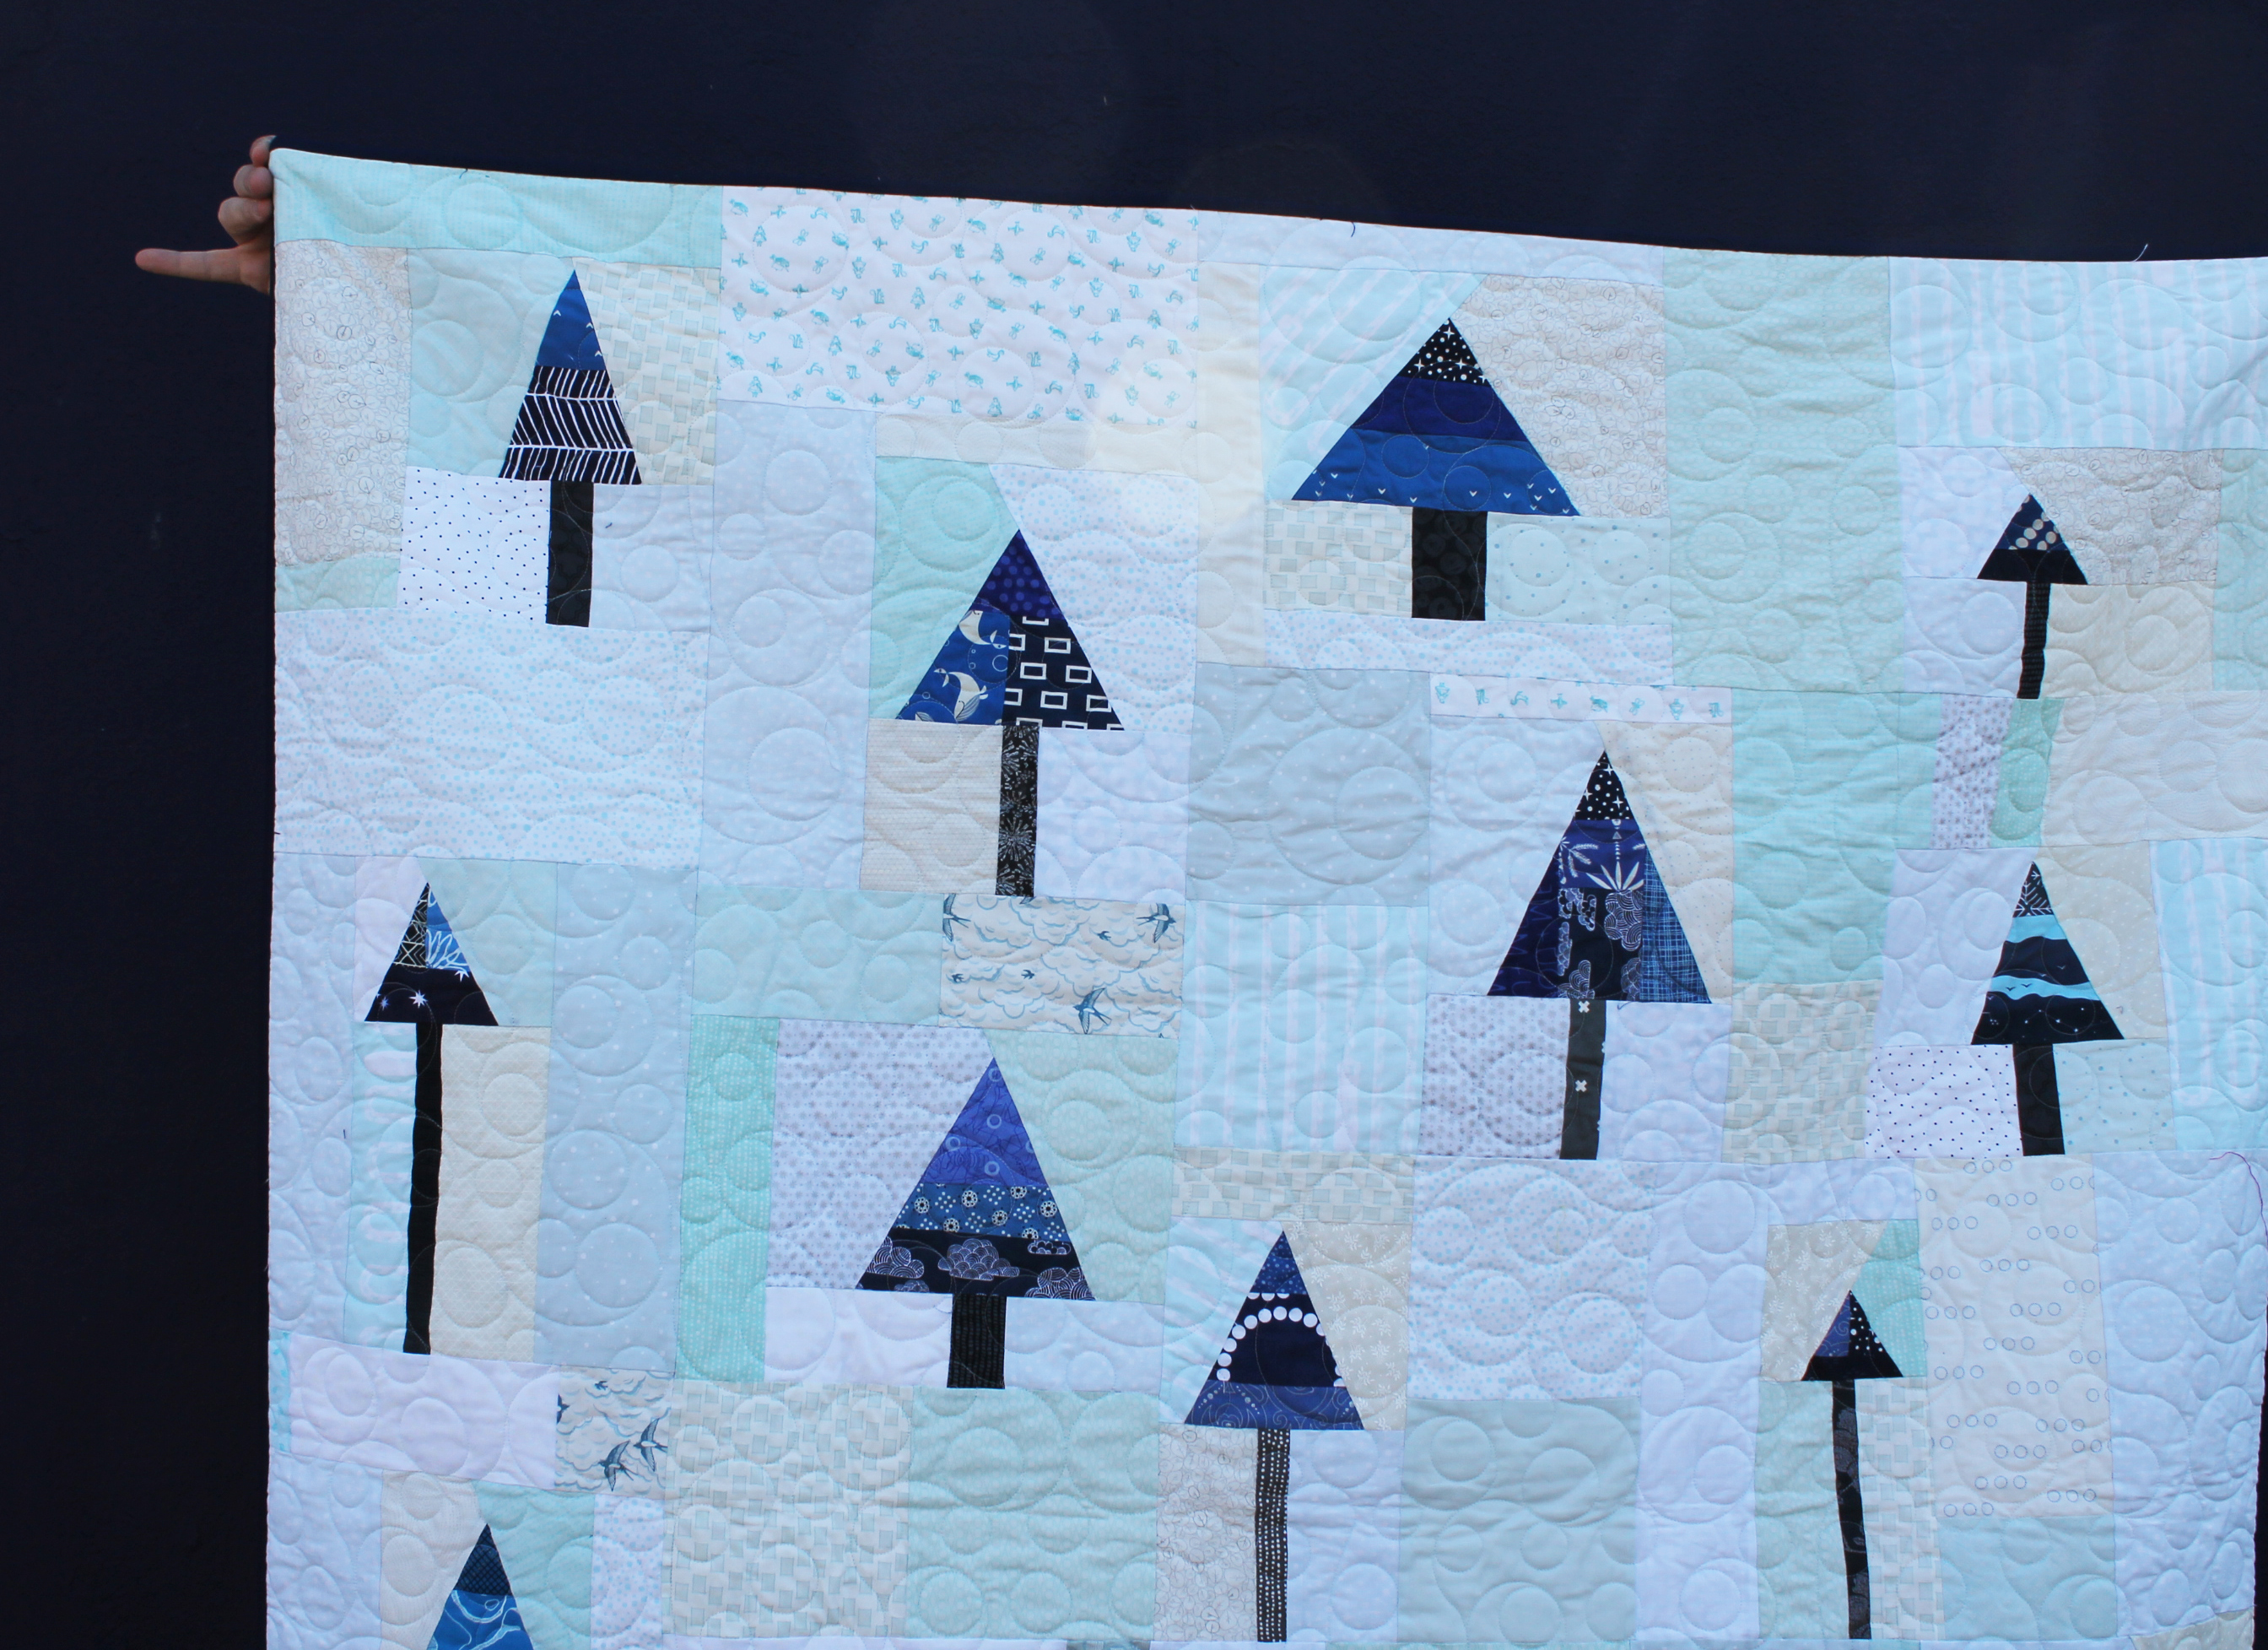
I have definitely made improv trees before usually with green follage of varying shapes and brown trunks… but with this quilt I limited myself to triangle trees in navy blue with dark grey for the trunks.
I used up a bit of my navy/blue scrap pile but really busted through my light blue/light grey stash and scraps. There is a fun “anything goes” with improv and it all seems to work… as long as you define some rules to begin.
For this quilt my parameters were for the background either light blue or light grey or low volume with blue print. I wanted the background to read overall cold. You can see from the pictures the cream based fabrics have a little warmth to them but they are not over powering.
The trees were navy or a dark blue. The touches of different shades of blue, like the royal blue add interest to the tree tops, so that they are not just a solid navy.
For the back of the quilt I used a piece of Tula Pink wide back that I was gifted by a friend. In the last couple of years I have been piecing a lot of my quilt backs….using up bigger cuts of fabric and scraps of wide back. I am not sure the long armers who help with the charity program as thrilled by my backs, but they make the quilts fun.
I have to finish with the obligatory photo of Nick’s pinkies. Mr Wombat has been such a support the last year…. not just holding up quilts but holding me up through some not so fun times.
So it has been a long long time since I blogged and this time I have really good excuse for the absence… if you follow me on Instagram you know already… but in the last days of 2020 I managed to have a stroke. Needless to say this year has been about giving myself room to adjust and heal.
So this post will not have any pretty quilt pictures but will have the story of my stroke adventure and some helpful tips on strokes.
So here is the story…. on the 29th of December I was sitting at my sewing machine finishing up making some blocks, as you do. I started feeling strange…dizzy and light headed…. then I lost control of the leg that was controlling the sewing machine. I stood up and somehow managed to “walk/stumble” to the living room chair. The dizzy was not a normal dizzy – the world was not rocking but spinning and the right side of my body was not behaving itself at all.
Luckily my husband was working from home so I called out to him…I believe I said “honey I have a small problem”….understatement of the year! As soon as I explained what was happening I think we both knew what was going on… but neither of us verbalised it…. I think we were scared of freaking each other out. We jumped in the car and headed to the emergency room. The rest of that day was a blur. Lots of tests, lots of questions and lots of needles. I was luck enough to be able to tell the doctors exactually when the stroke started (10:18am) and was in the emergency room in plenty of time to get TPA (Tissue Plasminogen Activator), a miracle clot busting drug.
When I arrived at the hospital I could walk into the ER but within about 20 minutes of arriving I could not move my right side at all. It took the drugs a bit to kick in and when they did I started getting some movement back. A couple of nights in hospital, lots of tests and monitoring and I was released New Years Eve.
I was exceptionally lucky. We realised what was happening and despite Covid fears went straight to the hospital. I knew exactly when the symptoms started and was able to get a wonderful drug that helped so much. In the USA you have a 3 hour window to the get the TPA drug…. in the UK and Australia it is 4 hours. This drug was the difference between me walking out of the hospital with a functioning right side and being permanently paralysed on the right side.
2020 was incredible stressful for many of us, and 2021 has not been a picnic either. Please do not skip you check ups and if you have high blood pressure please monitor it. If think you are having a stroke, you have any weakness on one of side of your body do not “wait for it to go away”. Go to hospital. Even a mini stroke or TIA (transient ischemic attack) are a pre-curser to a full blown stroke. Listen to your body. Trust your instincts if you think something is wrong the chances are high that you are right.
So 2021 started for me with a limp. I did lots and lots of PT and I am getting back on my feet. Somethings have changed forever…I am a stroke survivor…my right side is weak and I have reduced sensation on that side… my brain gets easily overloaded – bright lights, lots of noise, lots of people all throw me. But I am alive… and there is a few more benefits. The lack of sensation on my right side has meant that I can bind quilt after quilt without any pain in my fingers or hand and without a thimble. This year I have bound over 30 quilts, sometimes finishing two or three a week. I have also started using all the good fabric I have been hoarding for years…. which means I have lots of pretty quilts to share in the coming weeks/months. Also this year I said “yes” to a lot of things I would not normally do which included having my photo taken by a fabulous neighbor.
So this is me now…. older, greyer and wiser… but still me.
Next post I will start sharing some old finishes from the last 12 months or so. I have so much to share so stay tuned….
November is once again my turn to set a block for Do Good Stitches Hope circle. As always I procrastinated and pontificated and finally landed on this block….
I decided to call it the Splodge block. It is an improv log cabin…with most of the precision coming from choosing your fabrics carefully and not from cutting. Here are the steps to making this block…
STEP ONE:
Pull out all your blue, grey and white scraps.
STEP TWO:
Sort your colored scraps. This is a really important step in all scrap quilts and I am going to give you some guidelines for these blocks. This quilt is based on a cool palette and to make the block work you need to weed out some of your scrap because they will muddy the block.
BLUES: For the blues you are going to need dark, medium and light scraps… but in fabrics that are blenders, tone on tones or solids. Any fabric that has colors other than blue needs to go. That means…
You can see from my test block that I still used novelty prints, it is just they were cool prints with no extraneous colors.
GREYS: For your grey you are going to use the same principle as blue – tone on tone or blenders and no extra colors. But with grey there is one extra step.
Did you know that not all grey are the same and that grey fabrics have an undertone to them? This is a color cast that makes grey take on the hue of another color.
Grey can have a blue, green, orange or purple undertone. For this project we want to have cool greys in our block… we want to avoid using the warmer grey because it will muddy the block. A piece or two of the warm grey will not hurt but we want to mainly use the cool grey – the ones with a green, blue or purple undertone.
WHITE: The final pile of scraps to sort is your whites. We are looking for bright whites – solid or prints. In my blocks I have used a few white fabrics that have a bright white background with a cream print on them which have worked well… but we want to avoid cream fabrics if we can. Cream is a warm version of white and can again add warmth to a block if too much of it is used. A random piece is okay though.
You should end up with a curated pile of scraps that you can work with to make these blocks.
STEP THREE:
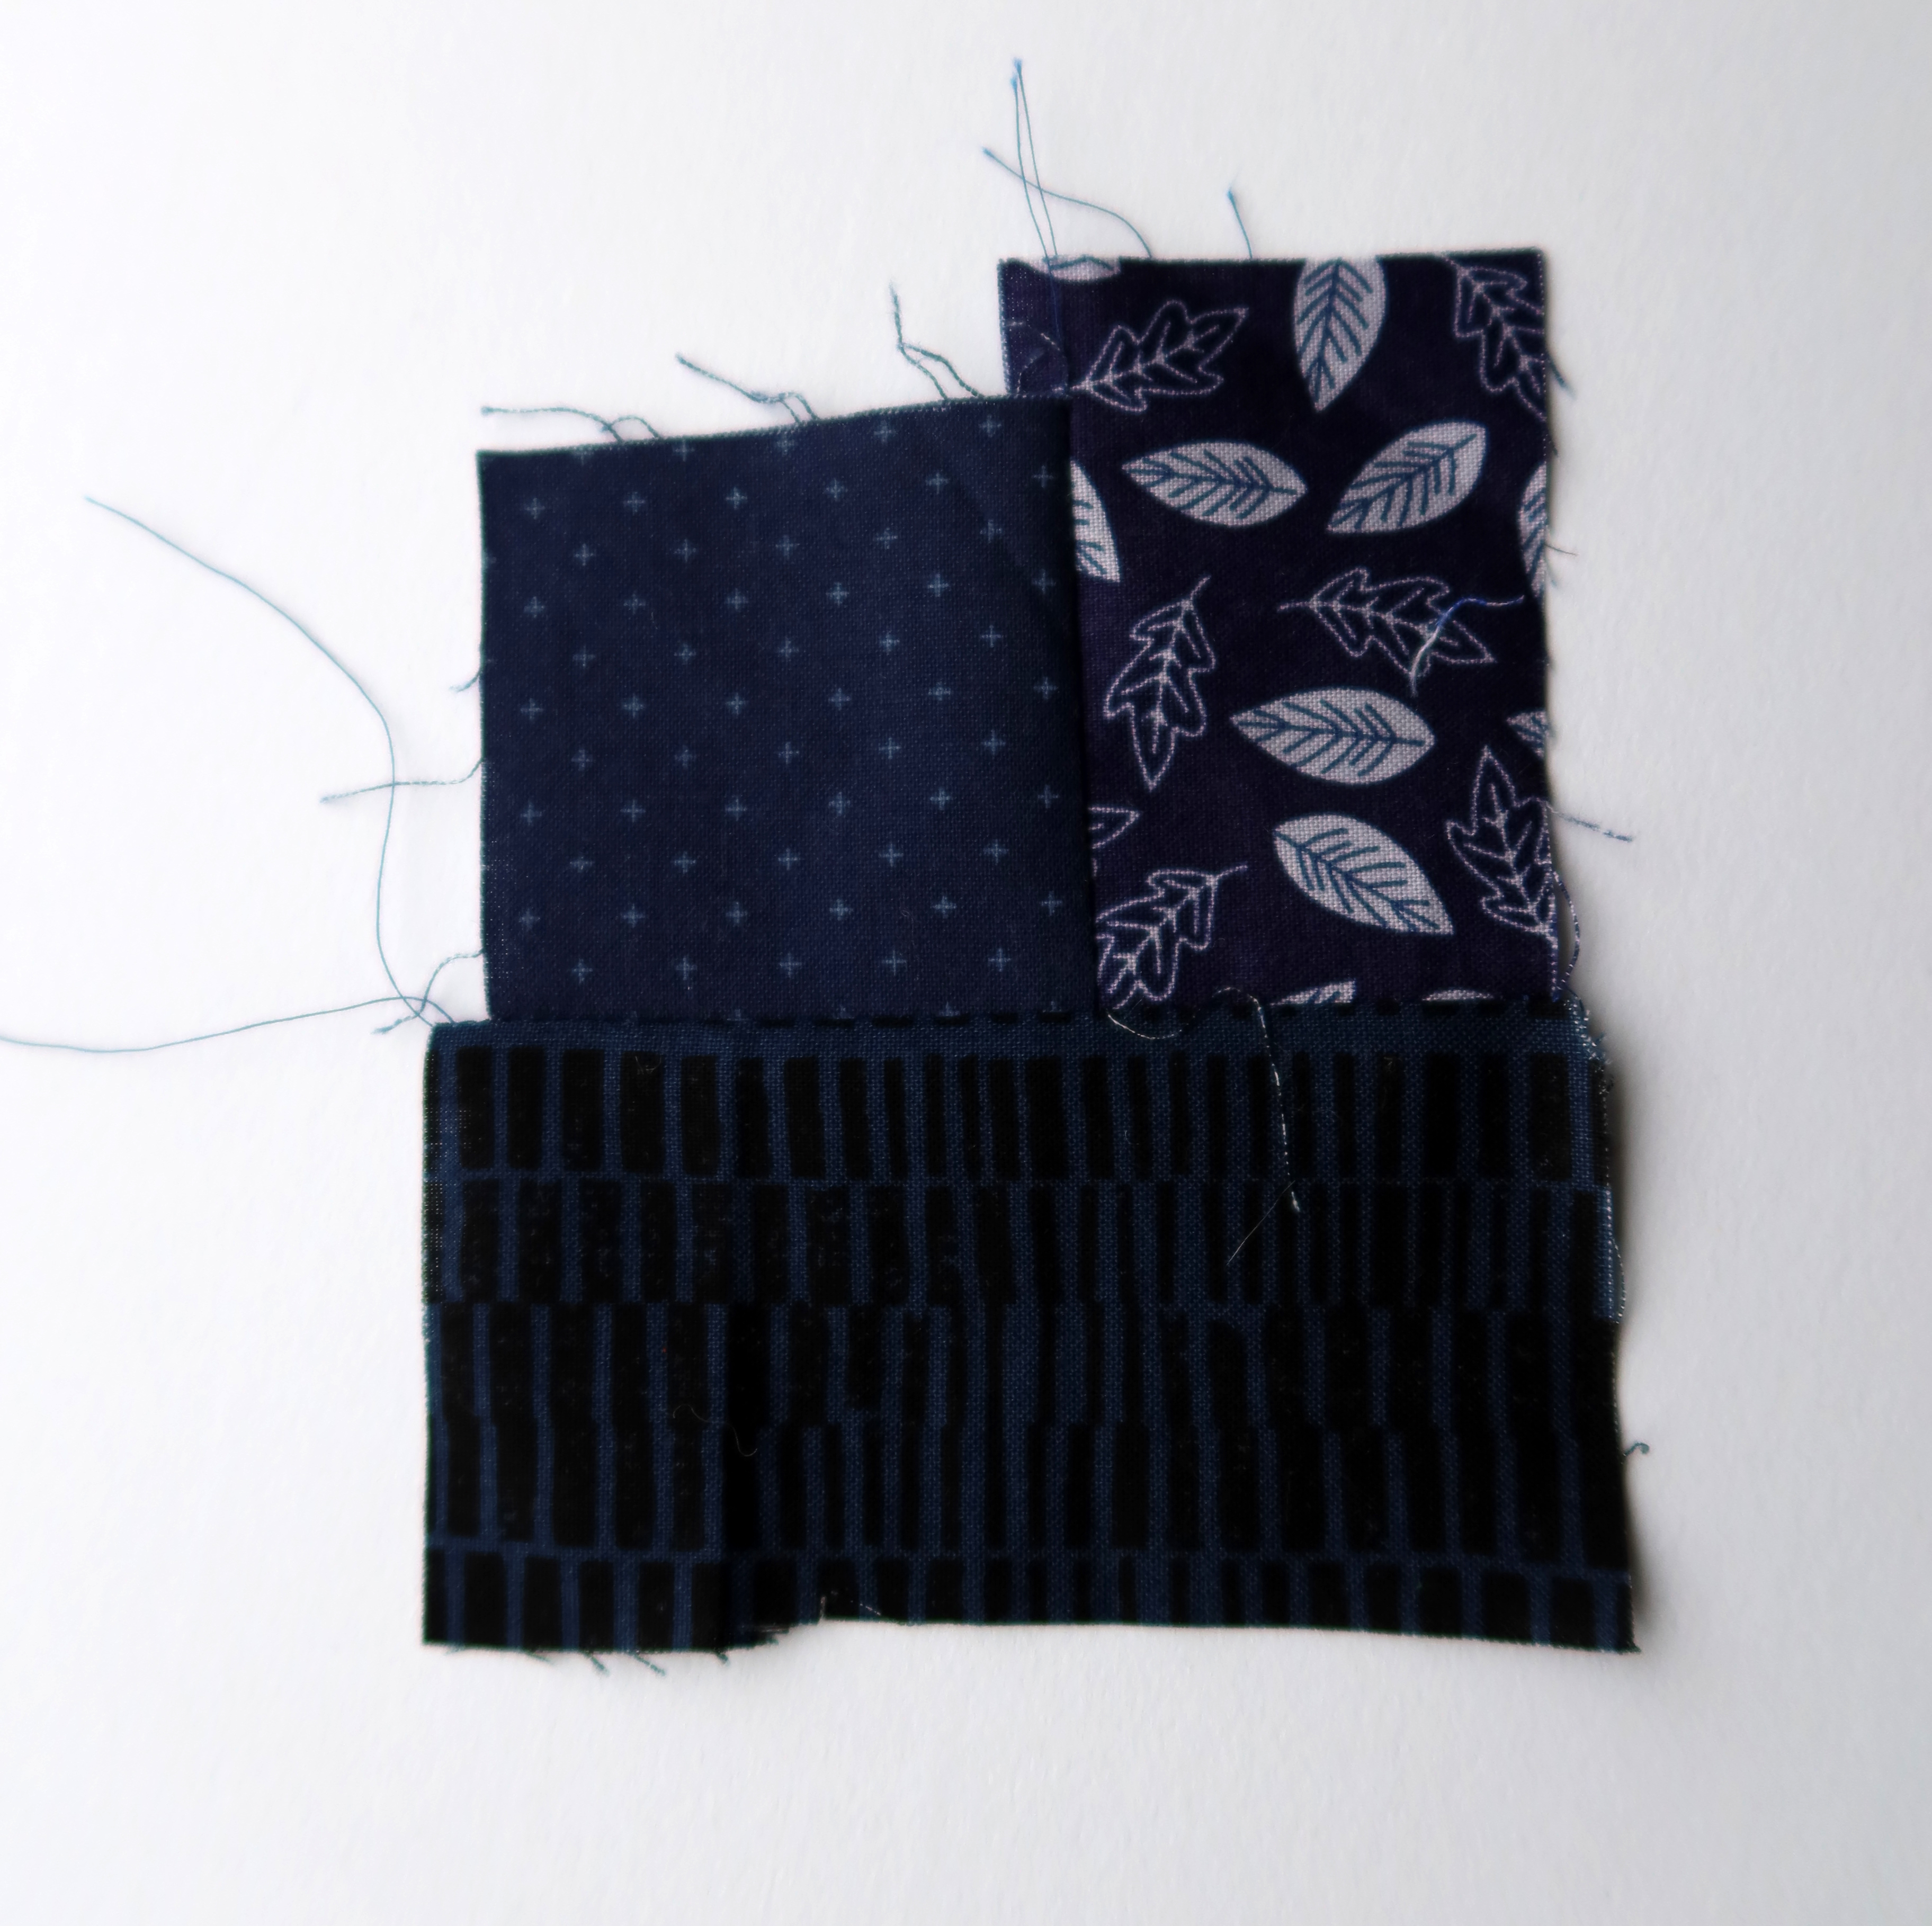
Start making your improv log cabins. The center of your log cabin is going to be your darkest navy blue fabric.
You can tell from this photo that I do not pretrim anything…. if I need to cut a piece of fabric smaller I use my scissors.
STEP FOUR:
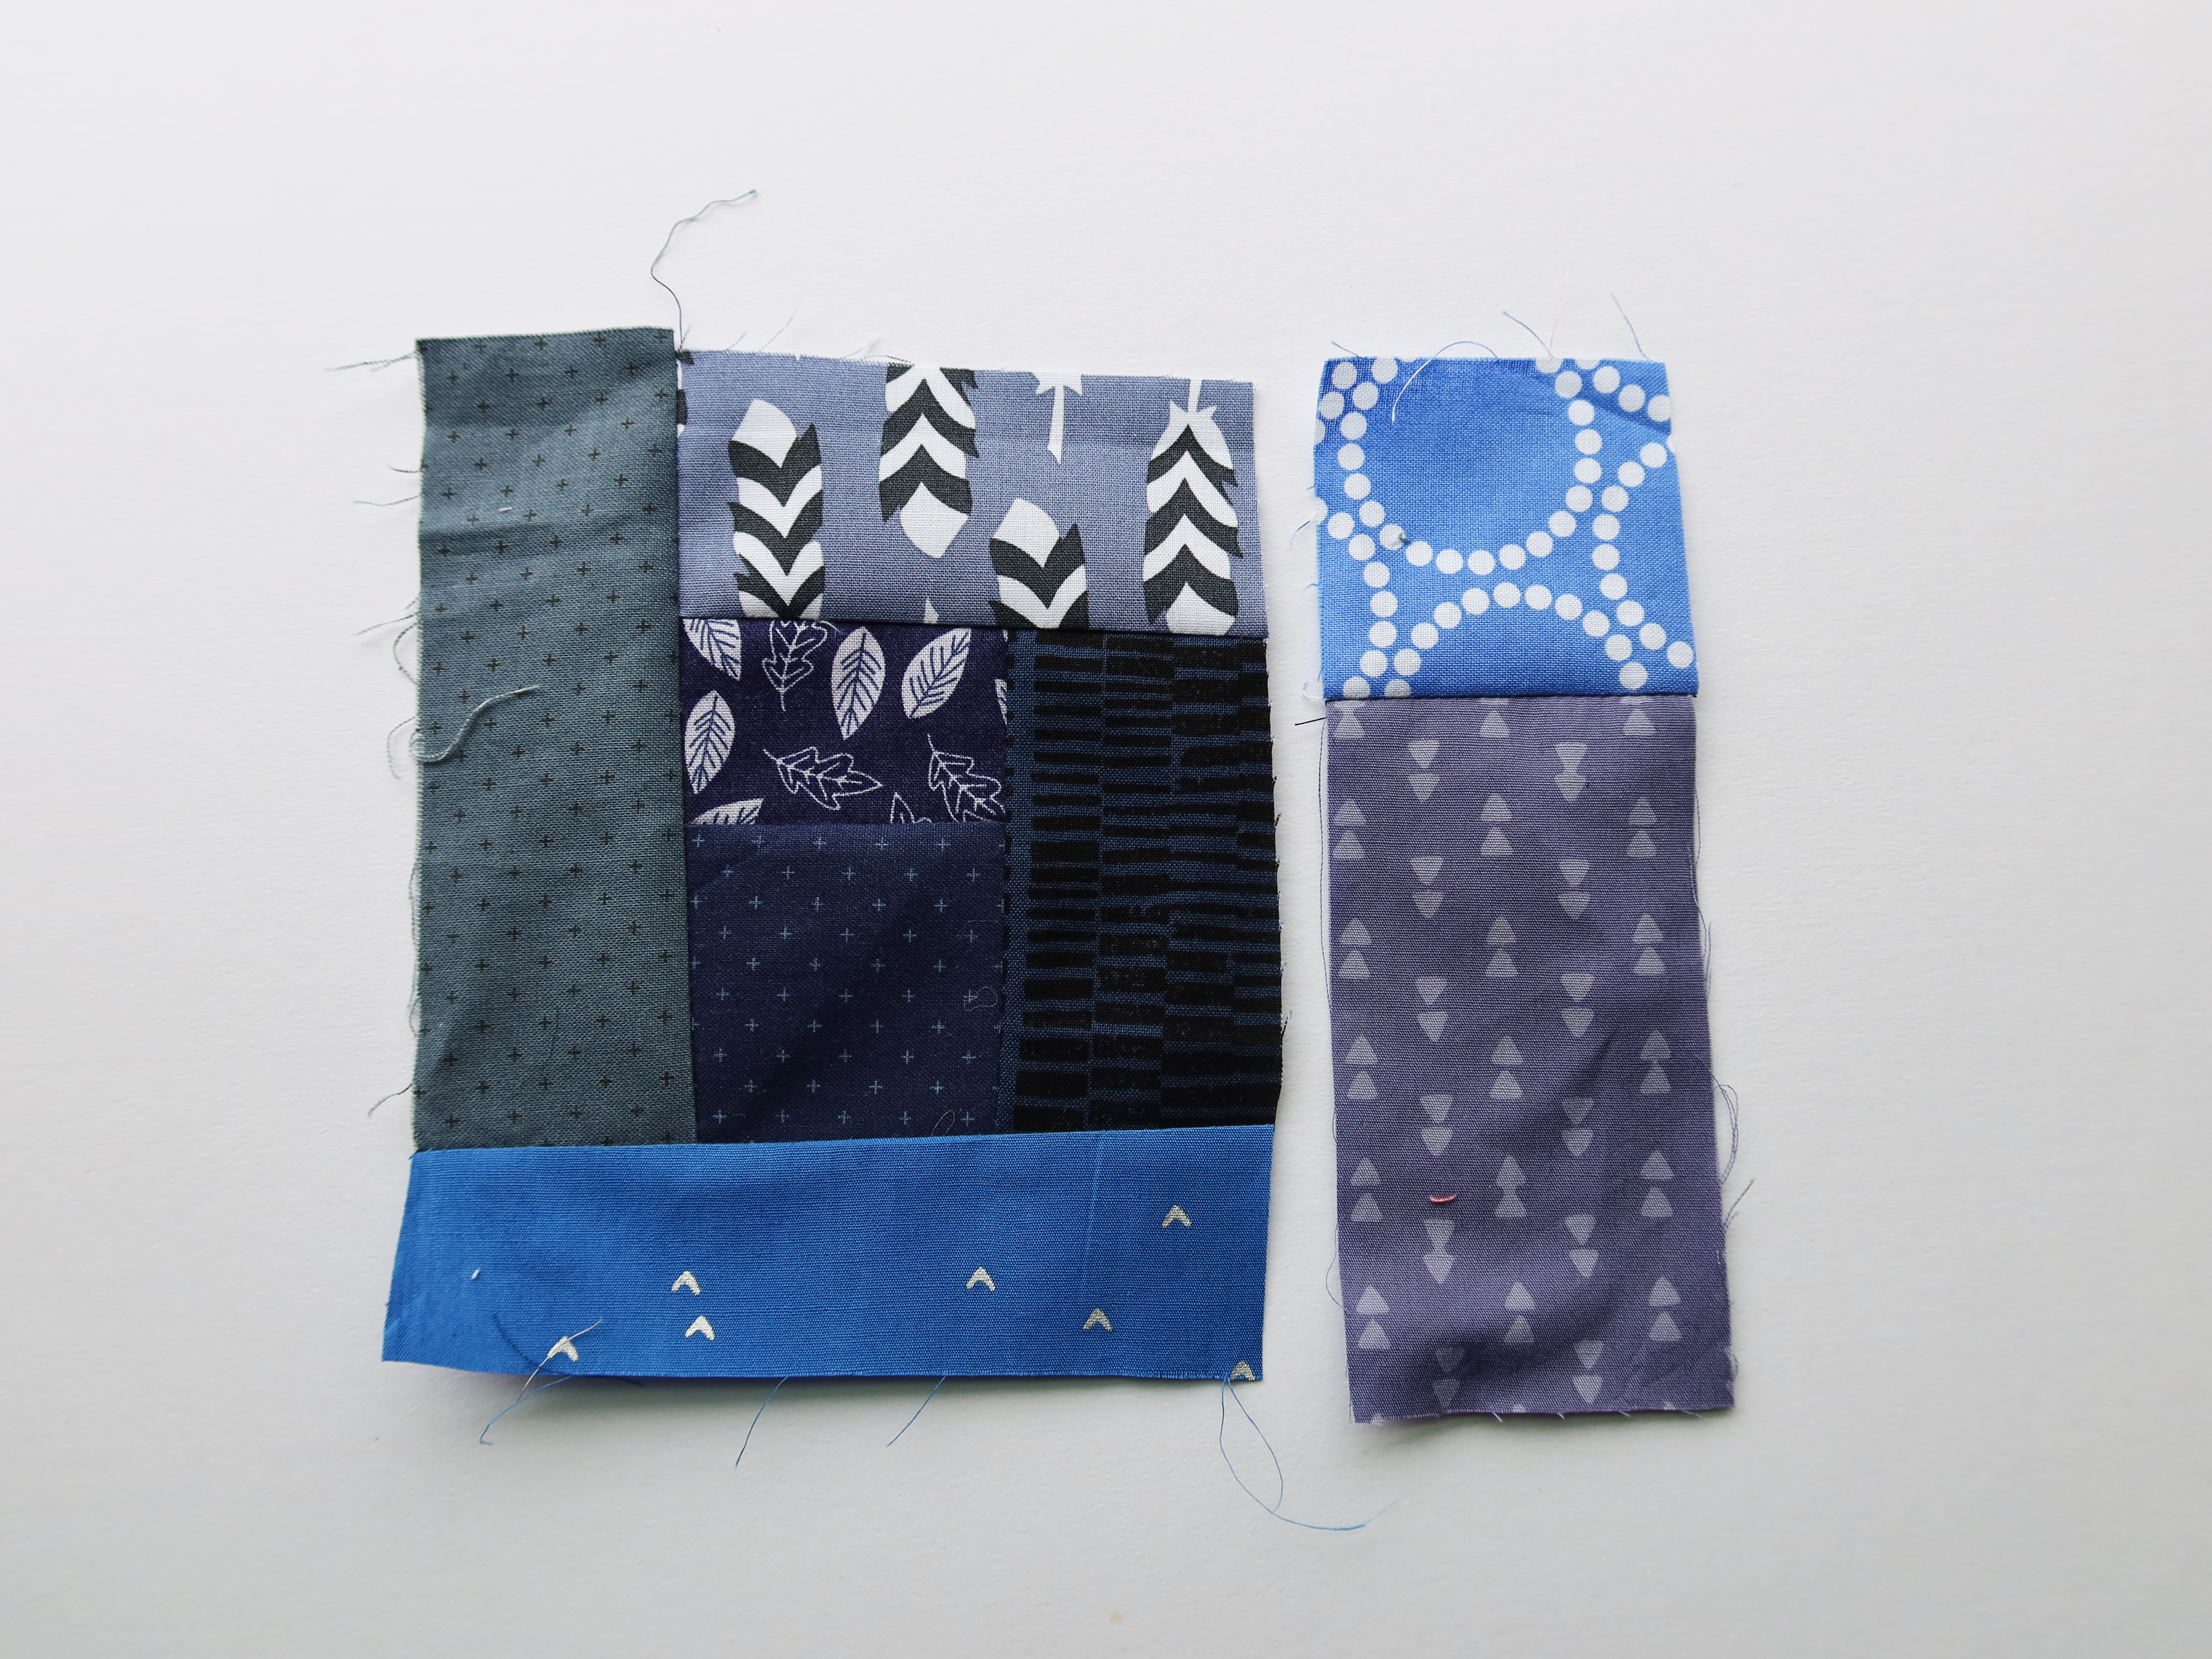
Keep building outward using lighter blues and greys as you move out from the center. Once the log cabin has started I do press as I add new pieces and I do trim the block….
…and when I say trim I mean I use a rotary blade and ruler to get a straight edge but I do not square anything up or check that anything is even. I just want a straight edge to sew my next strip too.
As you progress, I encourage you to make “logs” for your log cabin by sewing smaller pieces of fabric together to make your own strips.
These custom made strips are a great way to break up the traditional log cabin structure and give the block a more improv feel. They are also how the block becomes a splodge of color and not just a square of color.
STEP FIVE:
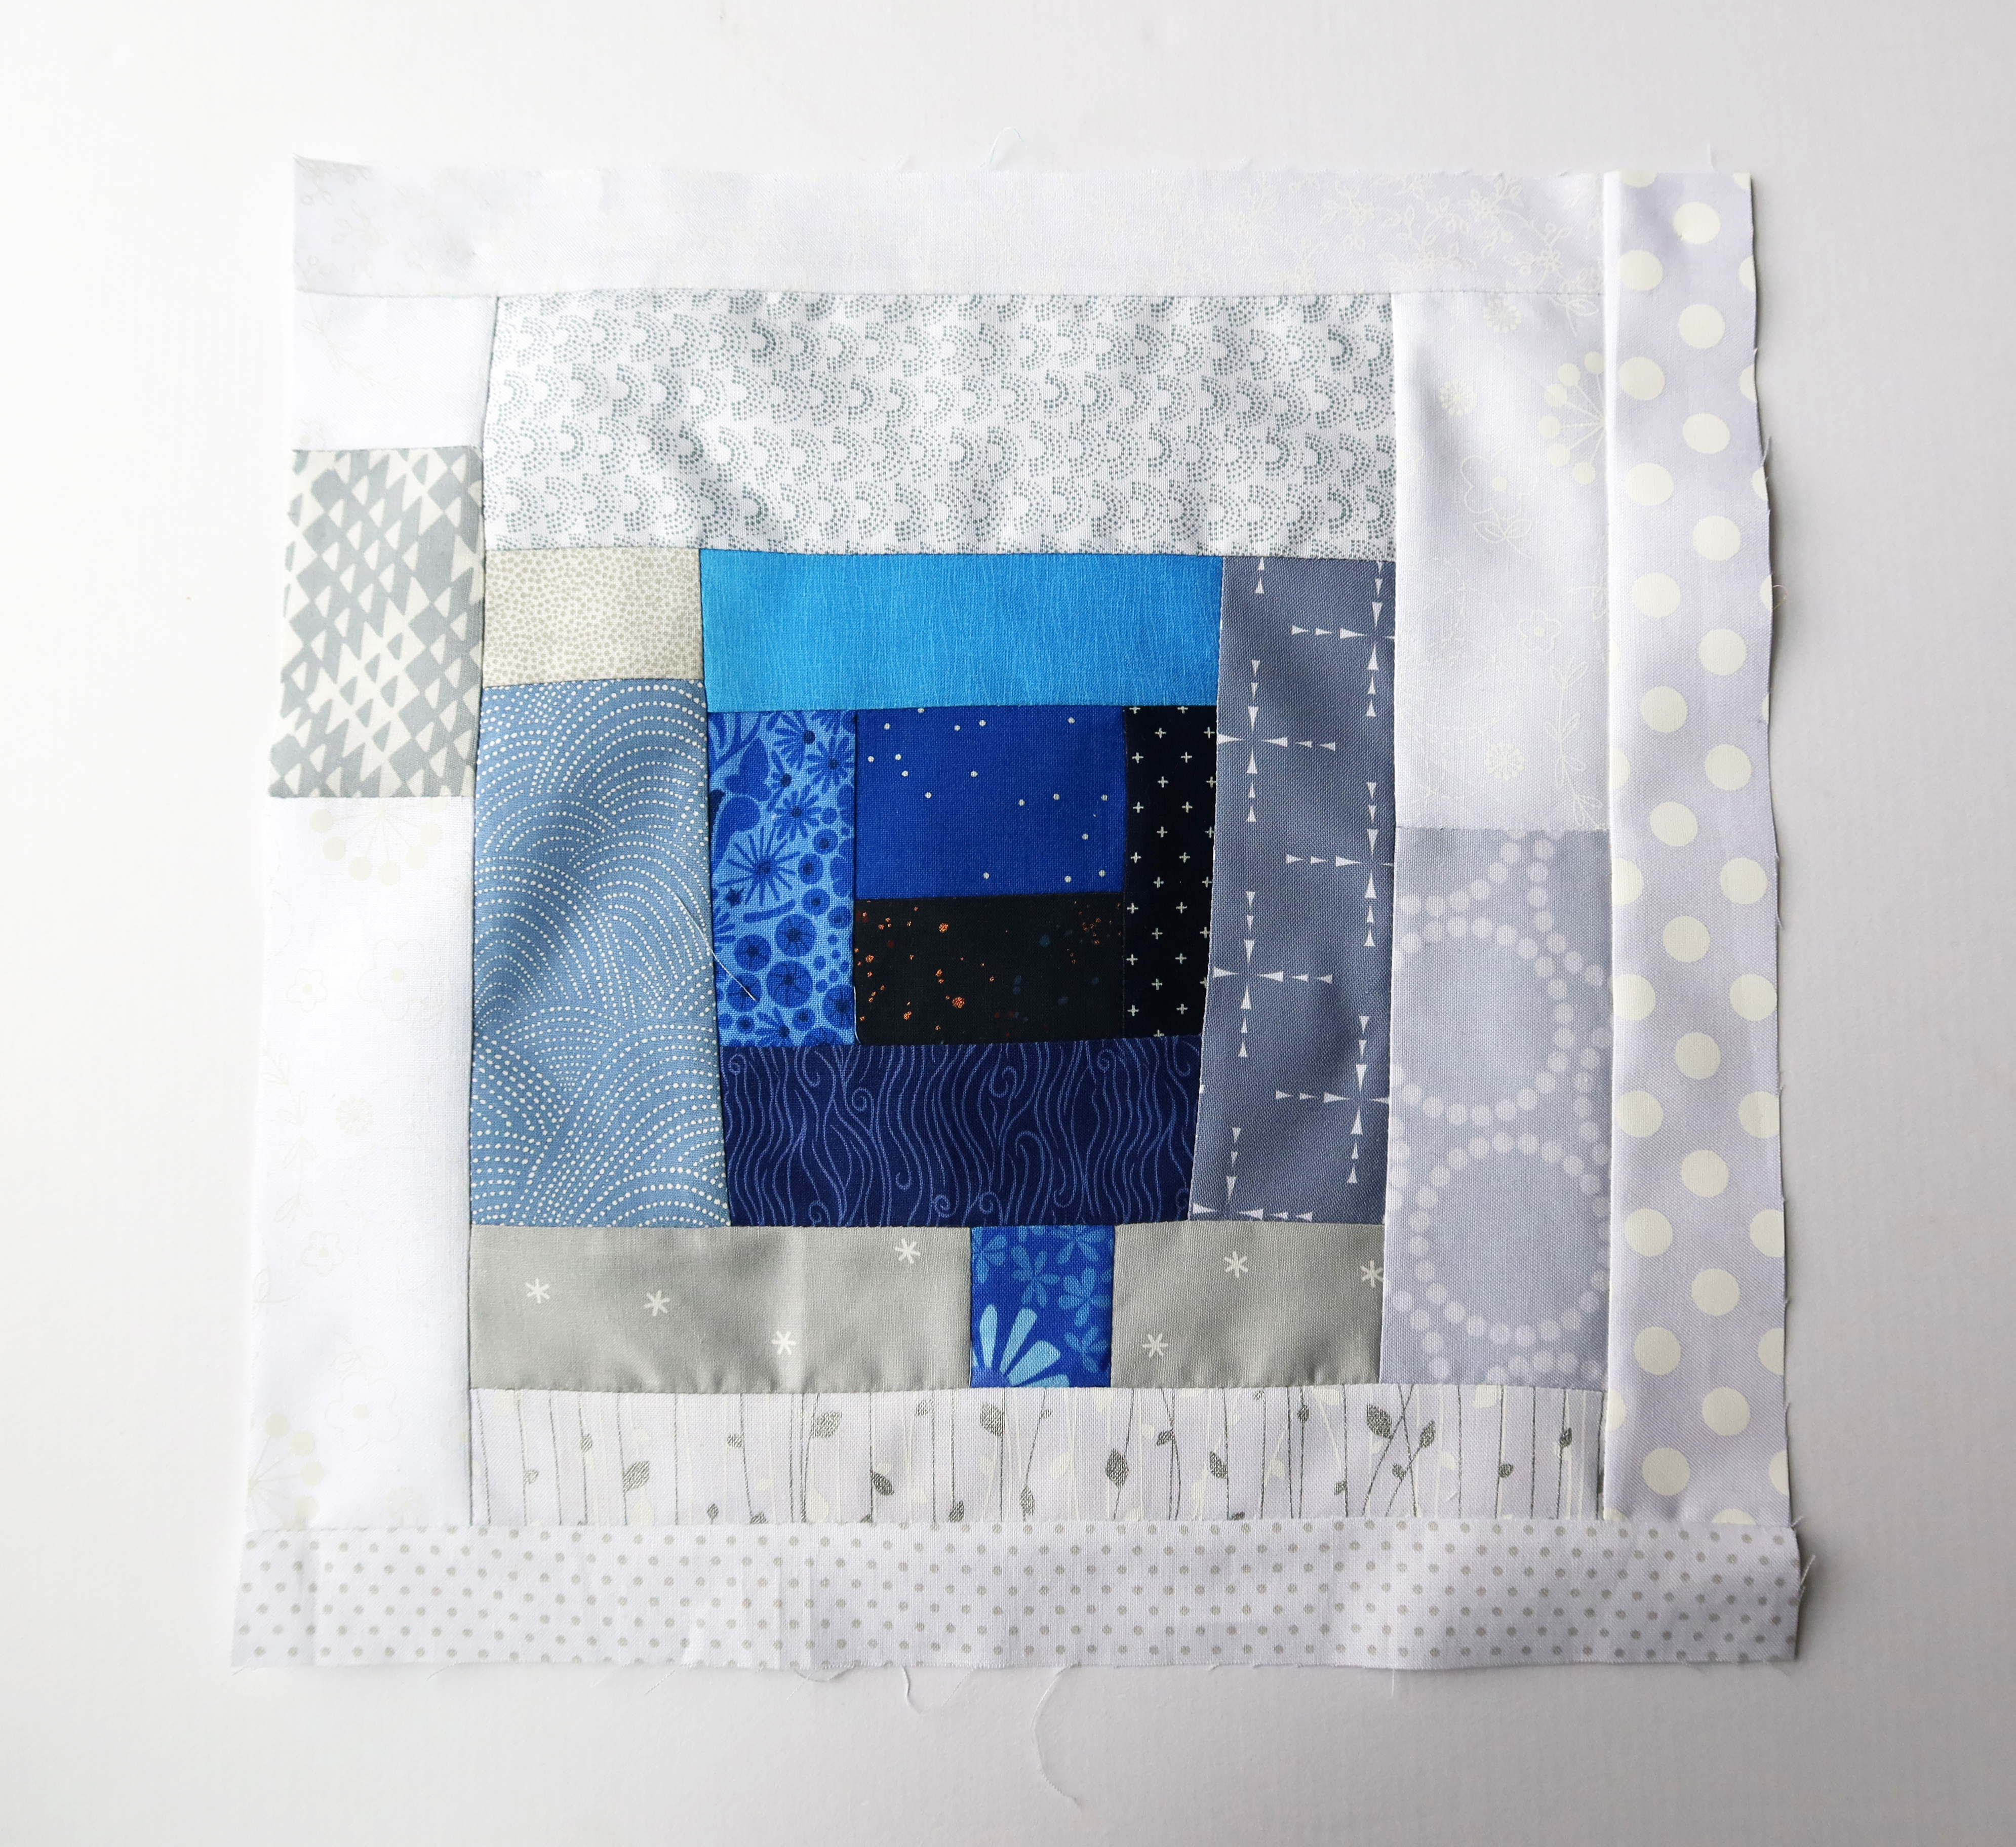
Keep building your log cabin out until you have a piece that is just larger than 12 1/2 inches square. You want to make sure the your last logs are white and/or light grey…you need a white frame around your splodge.
Once you have a large enough improv log cabin give it a final press and if you have starch (eg. Best Press) use it liberally at this stage to get your block to lay as flat as you can.
STEP SIX:
Using your 12 1/2 inch ruler trim your block to it’s finished size.
Note your splodge does not need to big. In my first block the blue splodge took up most of the block…while in this block there is a smaller lot of blue. You can make your splodge as big as you want….have fun….let go….play.
FINALLY:
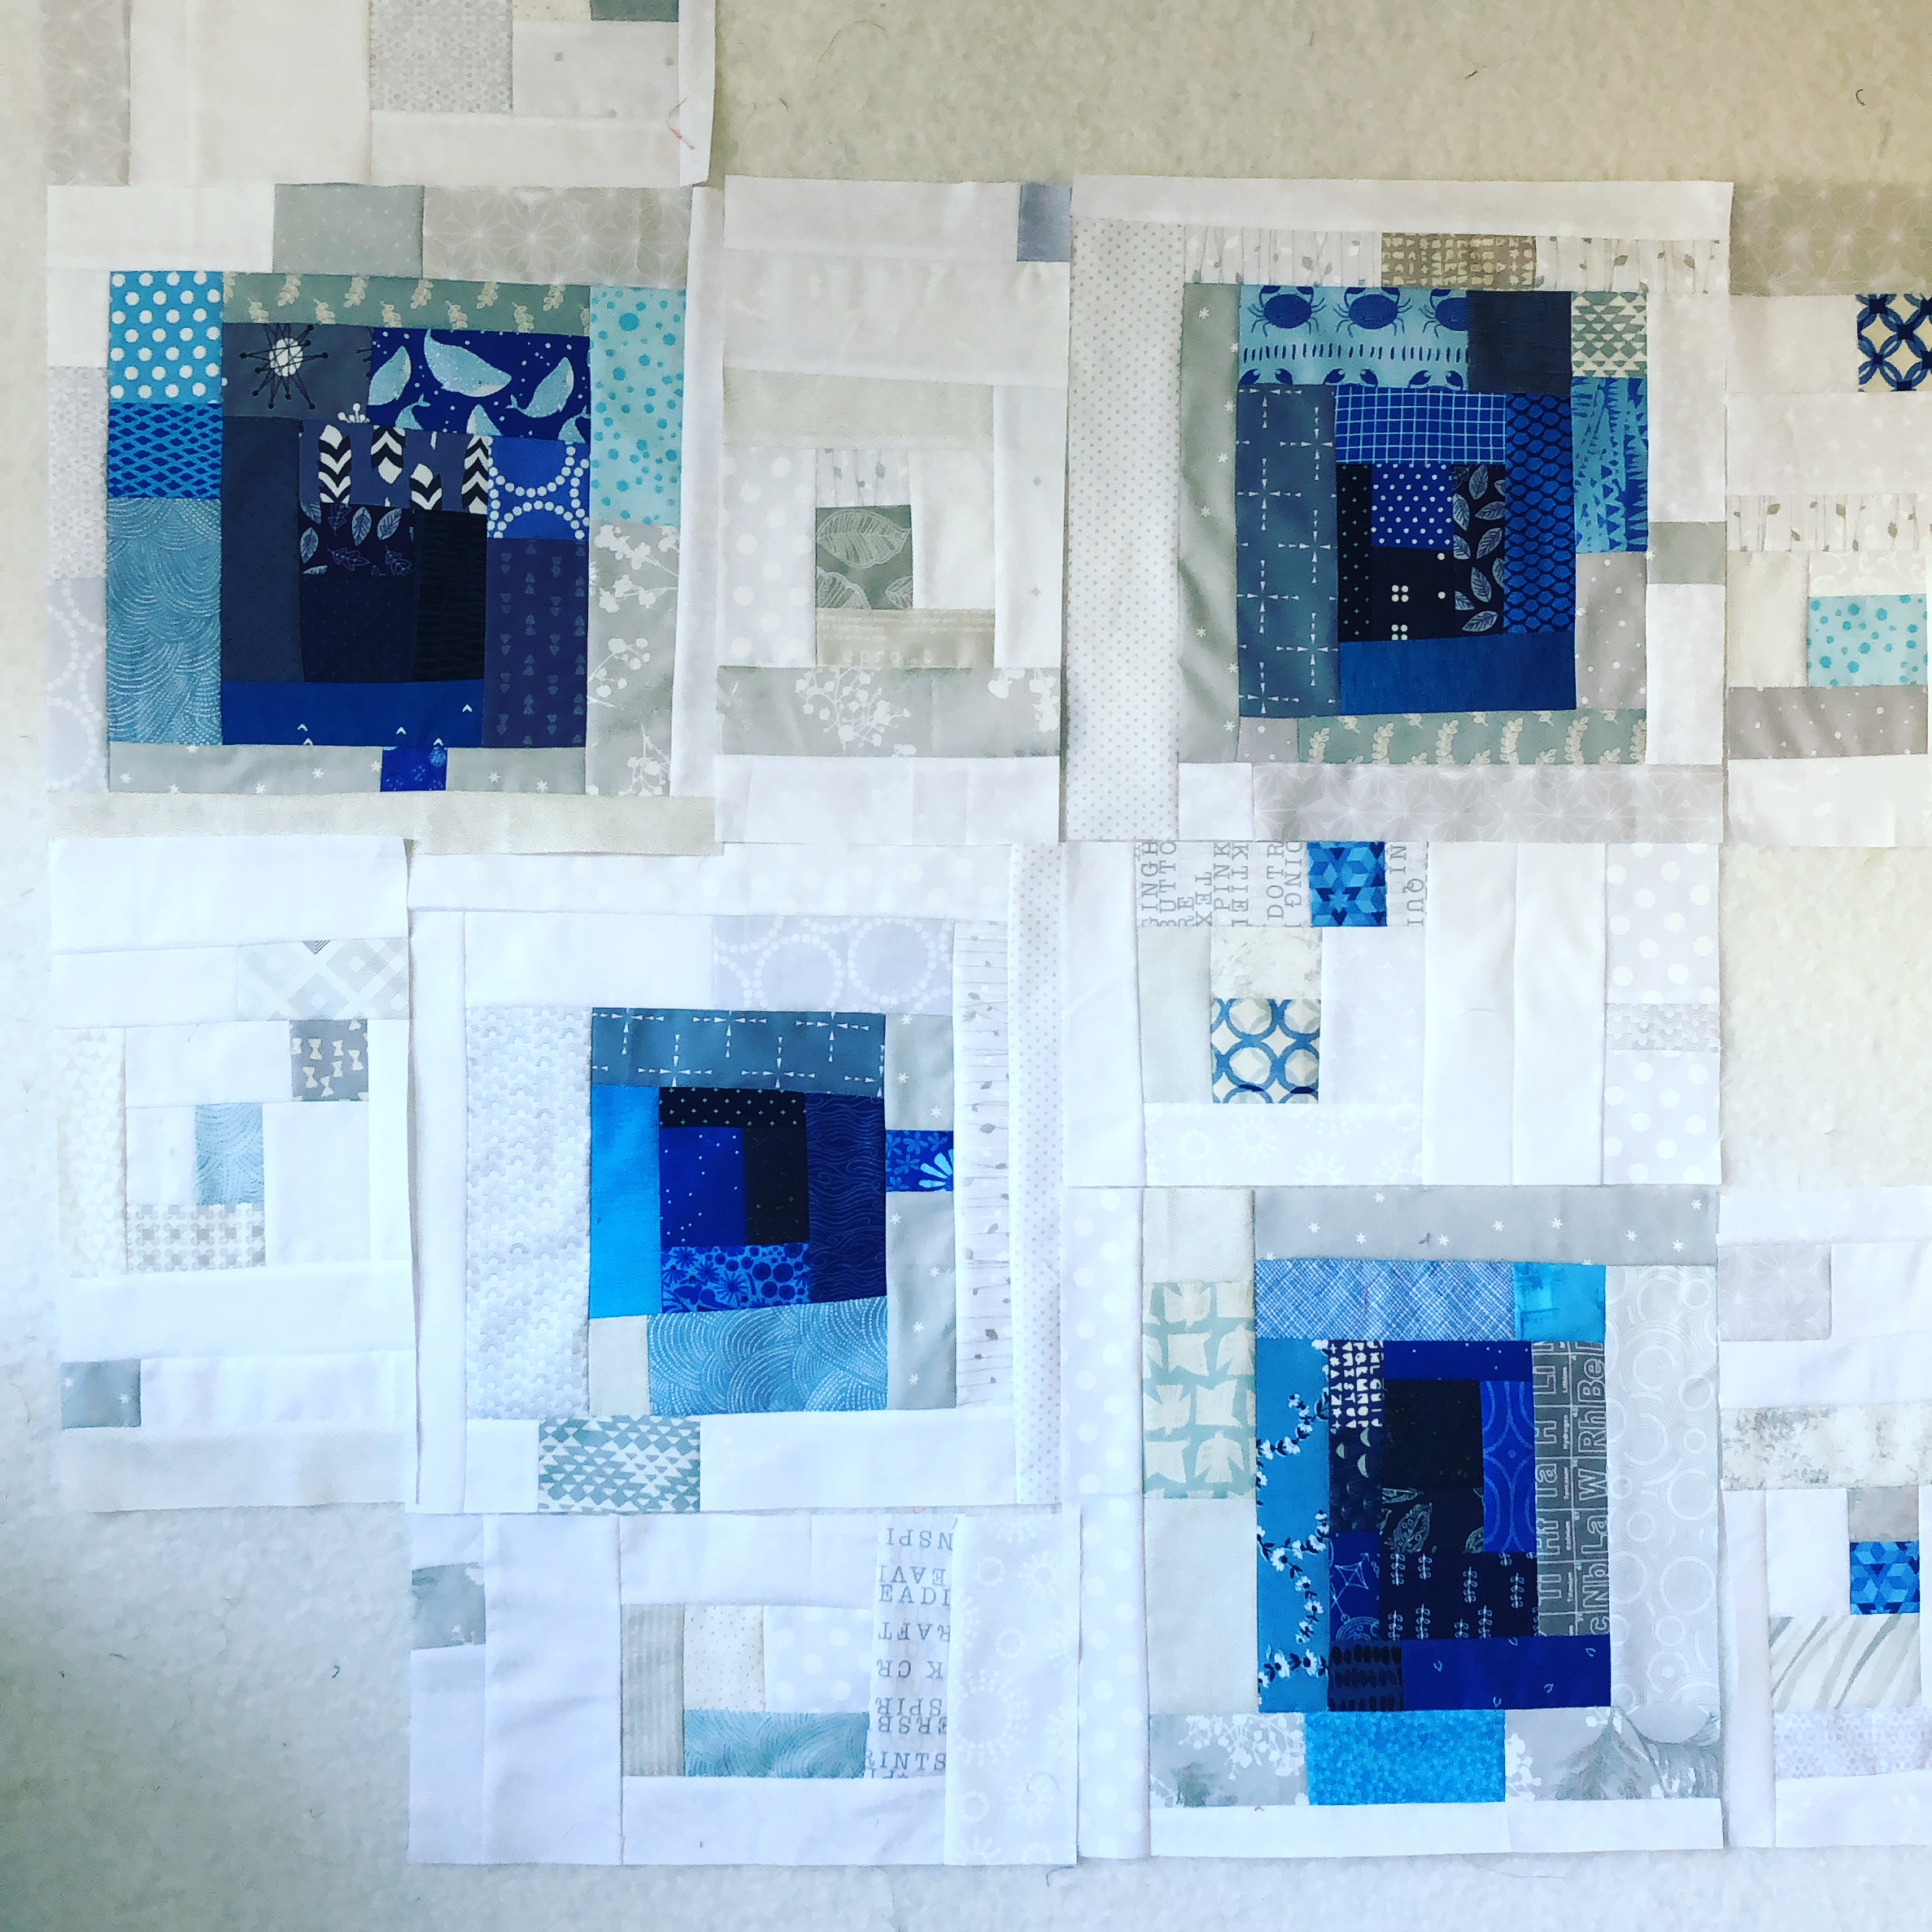
When I go to put this quilt together I decided I wanted to use filler blocks to give the splodges room to breath. These filler blocks are being made using just light grey and white fabric with the occasional blue or darker grey spot.
They are 12 1/2 inch by 6 1/2 inches unfinished and will allow me to layout the finished quilt in a irregular pattern…. the splodges will not all be neatly lined up but rather scattered around the quilt.
So there you have it… the splodge block. I am looking forward to seeing how my fellow DGS peeps interpret the splodge…and really looking forward to putting this quilt together.